
Before and After Pics by all restorers
-
BLU_FZ!

- Posts: 410
- Joined: Sun Sep 27, 2009 10:17 am
- Location: Perth?
Re: BEFORE AND AFTER PICS BY ALL RESTORERS
I "thicken up" when i see an Eddy  Very nice
"Him"-You do realize that you now own one of the rarest of all high end Nishikis ever produced?"Me"-But its still a Repco mate

-
mark field

- Posts: 933
- Joined: Fri Dec 17, 2010 8:28 pm
Re: BEFORE AND AFTER PICS BY ALL RESTORERS
[quote="damhooligan"]no before picture, because the frame already had some work done by owner...
It took me a looong time to get all the colours on the frame, but the endresult is quite nice.. :
yes very nice indeed, did you choose the colours or redo existing colours, and when do we get to see the finished bike??
It took me a looong time to get all the colours on the frame, but the endresult is quite nice.. :
yes very nice indeed, did you choose the colours or redo existing colours, and when do we get to see the finished bike??
steel is the real deal.
-
hewey
- Posts: 147
- Joined: Sat Jun 19, 2010 10:29 pm
Re: BEFORE AND AFTER PICS BY ALL RESTORERS
Giant Simple beach cruiser, my build was inspired by 1920s board track motorbikes 
Before

After

Before
After
-
mark field
- Posts: 933
- Joined: Fri Dec 17, 2010 8:28 pm
Re: BEFORE AND AFTER PICS BY ALL RESTORERS
unusual bars, very nice, hard to believe its the same bike.
steel is the real deal.
-
damhooligan

- Posts: 3409
- Joined: Mon Mar 09, 2009 5:16 pm
- Location: melbourne
- Contact:
Re: BEFORE AND AFTER PICS BY ALL RESTORERS
mark field wrote:damhooligan wrote:no before picture, because the frame already had some work done by owner...
It took me a looong time to get all the colours on the frame, but the endresult is quite nice.. :
yes very nice indeed, did you choose the colours or redo existing colours, and when do we get to see the finished bike??
I had another merckx frame borrowed from the owner, and matched the colors to that frame.
So the colors are as close as they can get to original.
It's not my frame, so as soon as the owner send me pictures, i wil put them up here.
I know the following saddle wil be used:
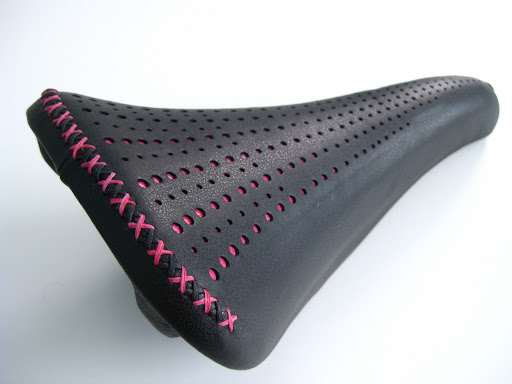
taken from http://busymanbicycles.blogspot.com/
The dutch have one word to describe the aussie MHL, this word is ;
SCHIJNVEILIGHEID !!
SCHIJNVEILIGHEID !!
-
WyvernRH

- Posts: 3186
- Joined: Tue Nov 06, 2007 6:41 pm
- Location: Newcastle NSW
Re: BEFORE AND AFTER PICS BY ALL RESTORERS
1950's Super Elliott
Before:
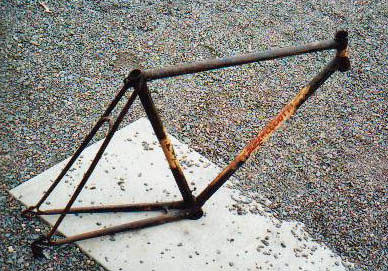
After:
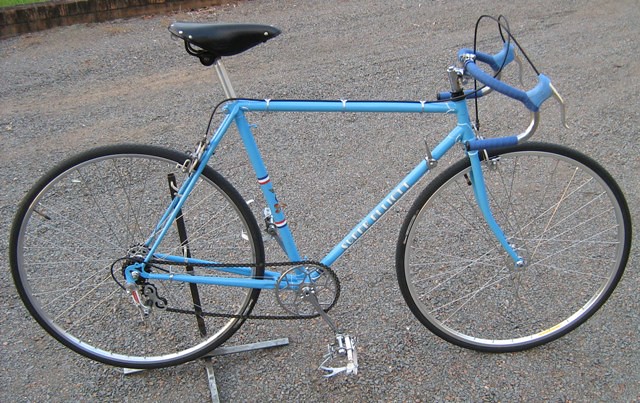
Cheers
Richard
Before:
After:
Cheers
Richard
-
mark field
- Posts: 933
- Joined: Fri Dec 17, 2010 8:28 pm
Re: BEFORE AND AFTER PICS BY ALL RESTORERS
awesome, you must be very pleased with the results, i like the blue hoods as well, a nice touch
steel is the real deal.
-
DRAD81
- Posts: 52
- Joined: Fri Dec 17, 2010 3:31 pm
Re: BEFORE AND AFTER PICS BY ALL RESTORERS
Nice bike restores.
Are most of you spraying the frames yourself, getting it done professionally or powder coating?
Are most of you spraying the frames yourself, getting it done professionally or powder coating?
-
mark field
- Posts: 933
- Joined: Fri Dec 17, 2010 8:28 pm
Re: BEFORE AND AFTER PICS BY ALL RESTORERS
i do all mine with a pressure pac, its much more laboursome but also much more cheaper and way more rewarding.DRAD81 wrote:Nice bike restores.
Are most of you spraying the frames yourself, getting it done professionally or powder coating?
steel is the real deal.
-
WyvernRH
- Posts: 3186
- Joined: Tue Nov 06, 2007 6:41 pm
- Location: Newcastle NSW
Re: BEFORE AND AFTER PICS BY ALL RESTORERS
Just to give another view, I get the basic colours of all mine done professionally and do the detailing (lugs. box lining. lettering) myself. While I am handy with the torch and files I am absolute s##te with any sort of paint. I am not even allowed to paint walls by the wifemark field wrote:i do all mine with a pressure pac, its much more laboursome but also much more cheaper and way more rewarding.DRAD81 wrote:Nice bike restores.
Are most of you spraying the frames yourself, getting it done professionally or powder coating?
Cheers
Richard
-
rebilda

- Posts: 252
- Joined: Sat Jan 01, 2011 6:08 pm
- Location: Sydney
Re: BEFORE AND AFTER PICS BY ALL RESTORERS
+1 on the auto colour pressurepacks.
Loads of colour choices. let you imagination run wild & just clear coat over the top
Saying that, my Paino was done professionally at the local smash repairer. Mainly because I wanted it done in Ford "nitro" & I couldnt get it in a pressure pack
Loads of colour choices. let you imagination run wild & just clear coat over the top
Saying that, my Paino was done professionally at the local smash repairer. Mainly because I wanted it done in Ford "nitro" & I couldnt get it in a pressure pack
My Garage = Restored Paino - the "Fixie" - Giant Trance X2 - Azzurri Forza Pro Di2 - GT Avalanche 1 & 2
-
mark field
- Posts: 933
- Joined: Fri Dec 17, 2010 8:28 pm
Re: BEFORE AND AFTER PICS BY ALL RESTORERS
you realise of course that you have to show some pictures of this nitro coloured cyclerebilda wrote:+1 on the auto colour pressurepacks.
Loads of colour choices. let you imagination run wild & just clear coat over the top
Saying that, my Paino was done professionally at the local smash repairer. Mainly because I wanted it done in Ford "nitro" & I couldnt get it in a pressure pack
steel is the real deal.
-
munga

- Posts: 7023
- Joined: Mon Jan 28, 2008 3:17 pm
- Location: wowe
- Contact:
Re: BEFORE AND AFTER PICS BY ALL RESTORERS
i believe autobarns can do it, paulymark field wrote:.. and actually there is a company that can fill spray cans with whatever colour you want, i just cant remember who unfortunately, as i need to do some touch ups on the old ford.

-
mark field
- Posts: 933
- Joined: Fri Dec 17, 2010 8:28 pm
Re: BEFORE AND AFTER PICS BY ALL RESTORERS
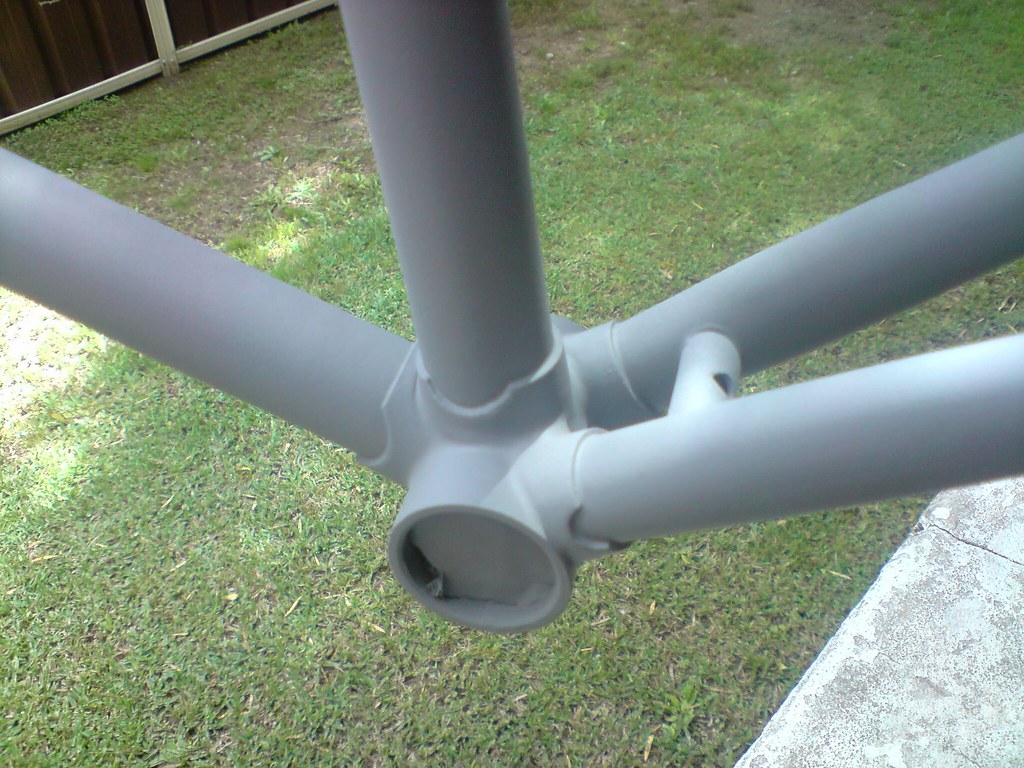
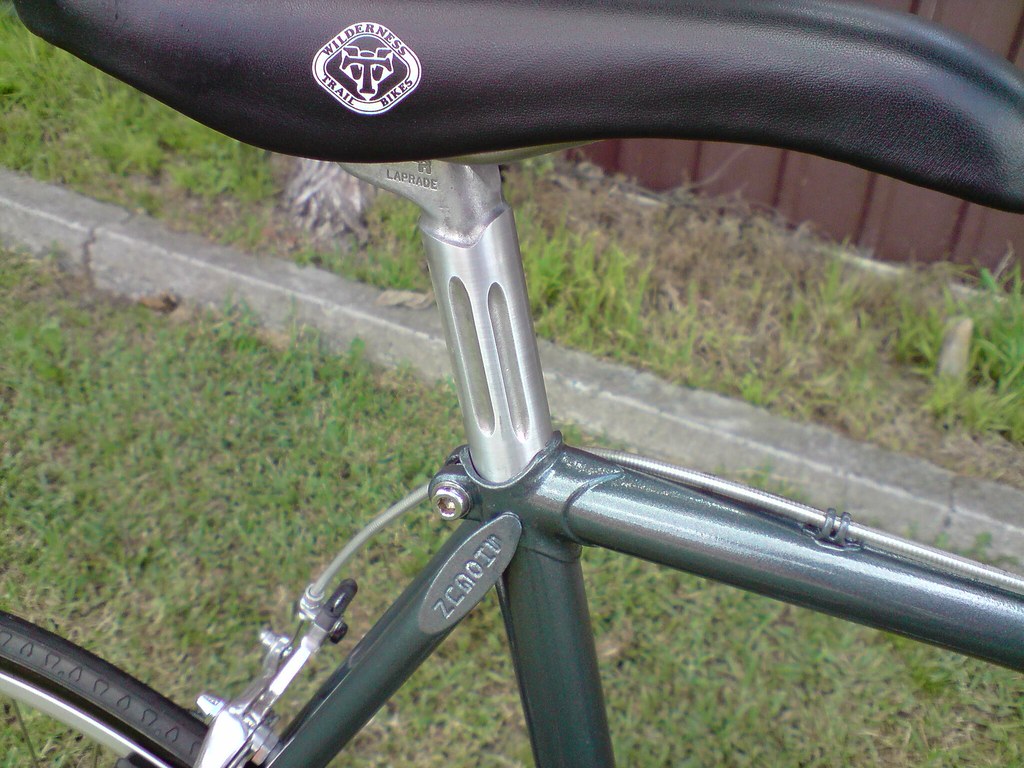
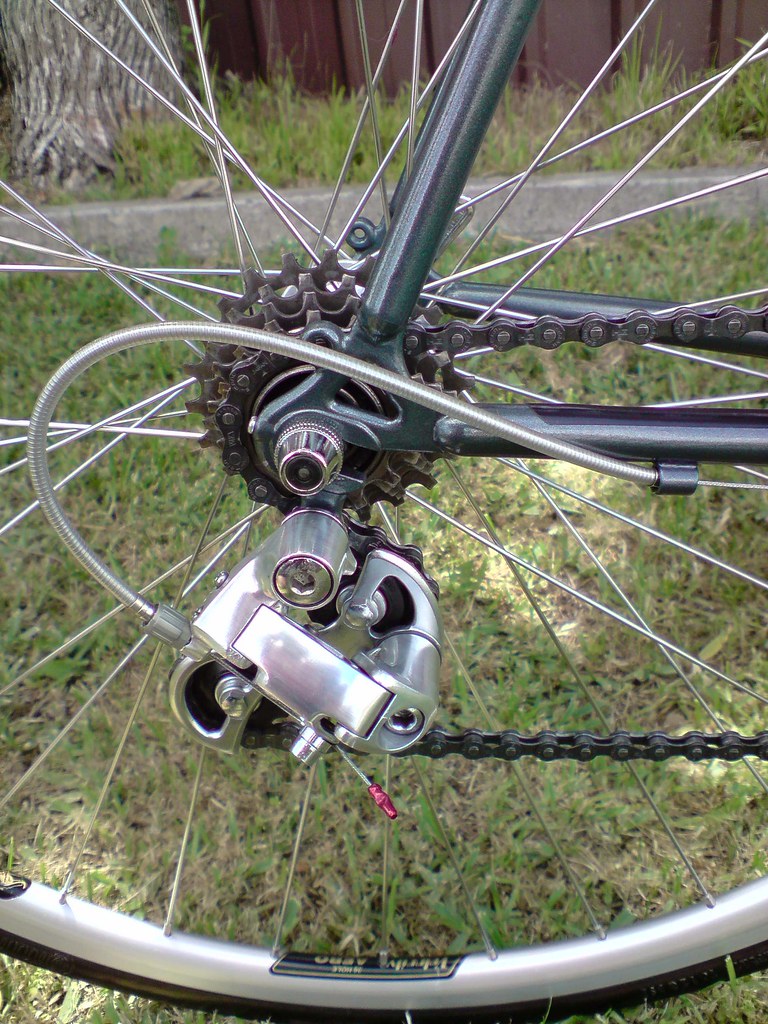
heres my Shogun Katana.
as i foung her on ebay by markfield_32, on Flickr
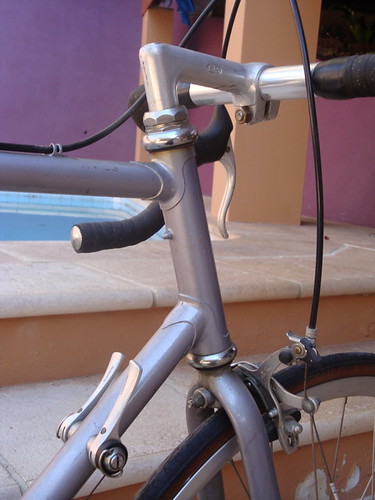
front with all the good bits by markfield_32, on Flickr
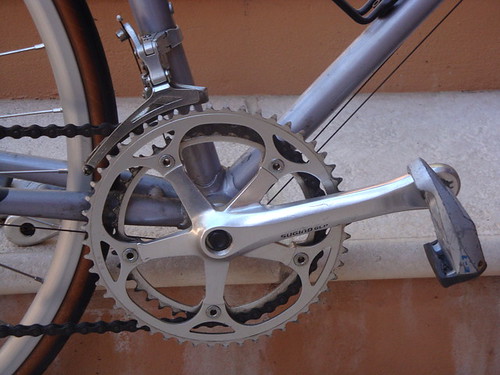
sugino crank by markfield_32, on Flickr
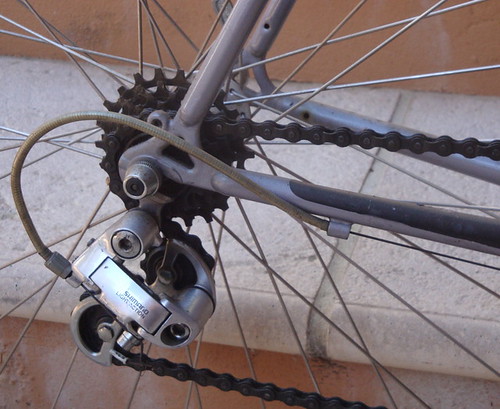
rear derailer by markfield_32, on Flickr
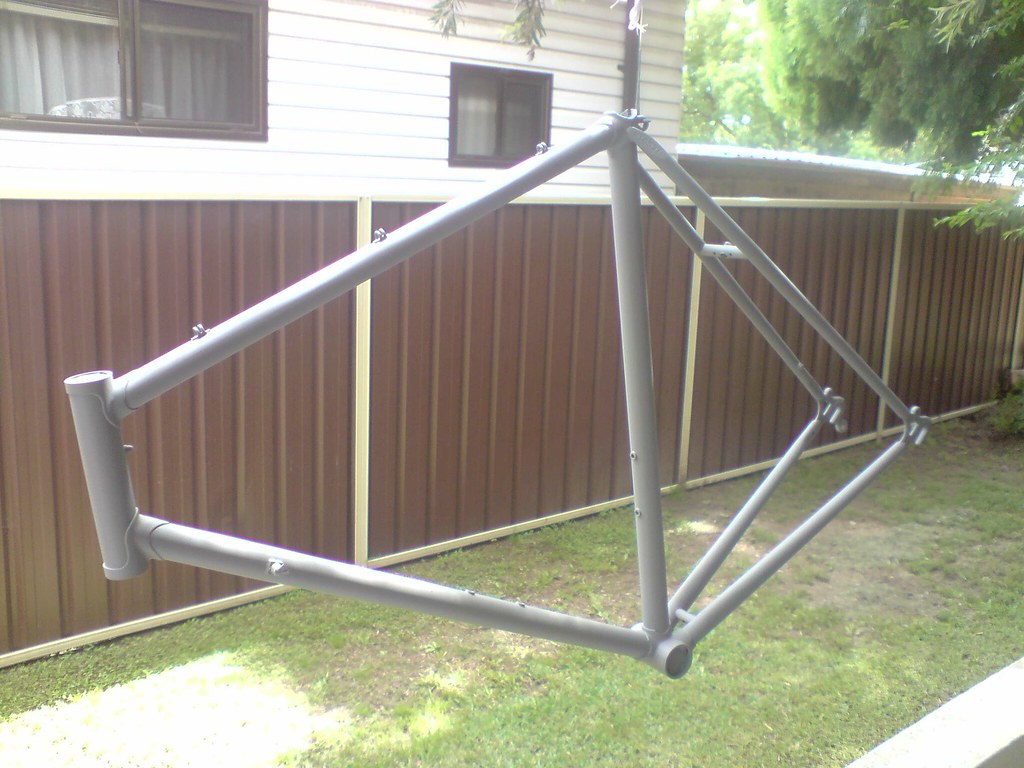
the frame - hanging by a thread. by markfield_32, on Flickr
some nice detail of bottom bracket by markfield_32, on Flickr
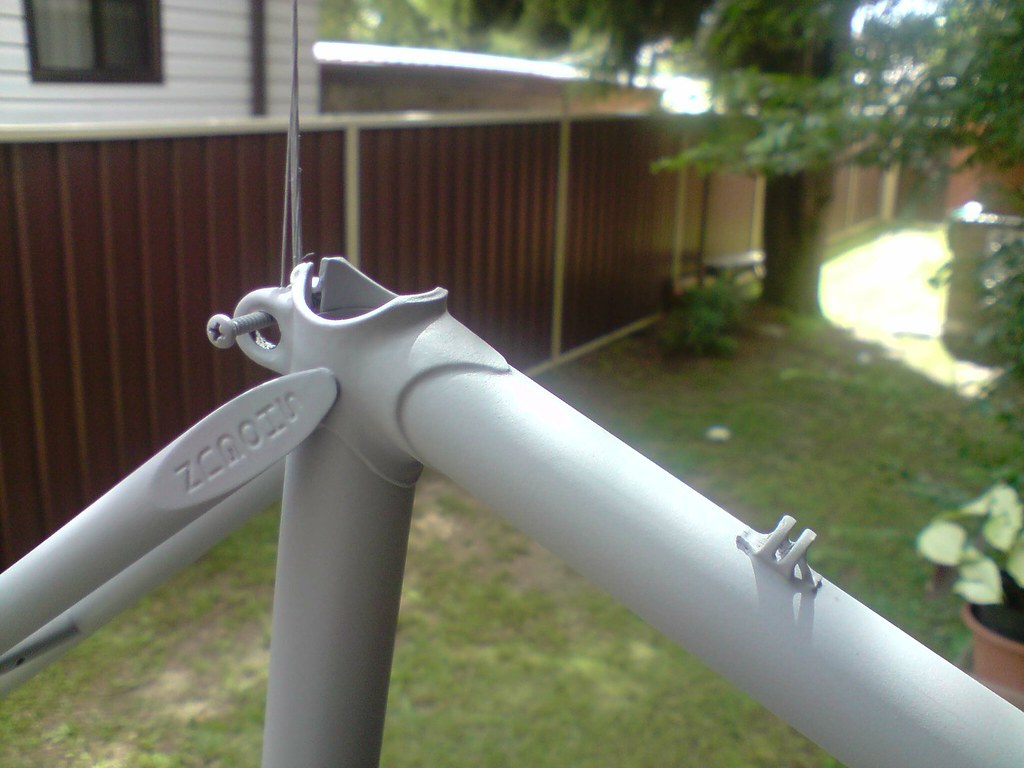
rubbed back, primed waiting for sanding and topcoats by markfield_32, on Flickr
seatpost after sanding with fine grade wet and dry. by markfield_32, on Flickr
after dismantling, polishing and re assembly by markfield_32, on Flickr
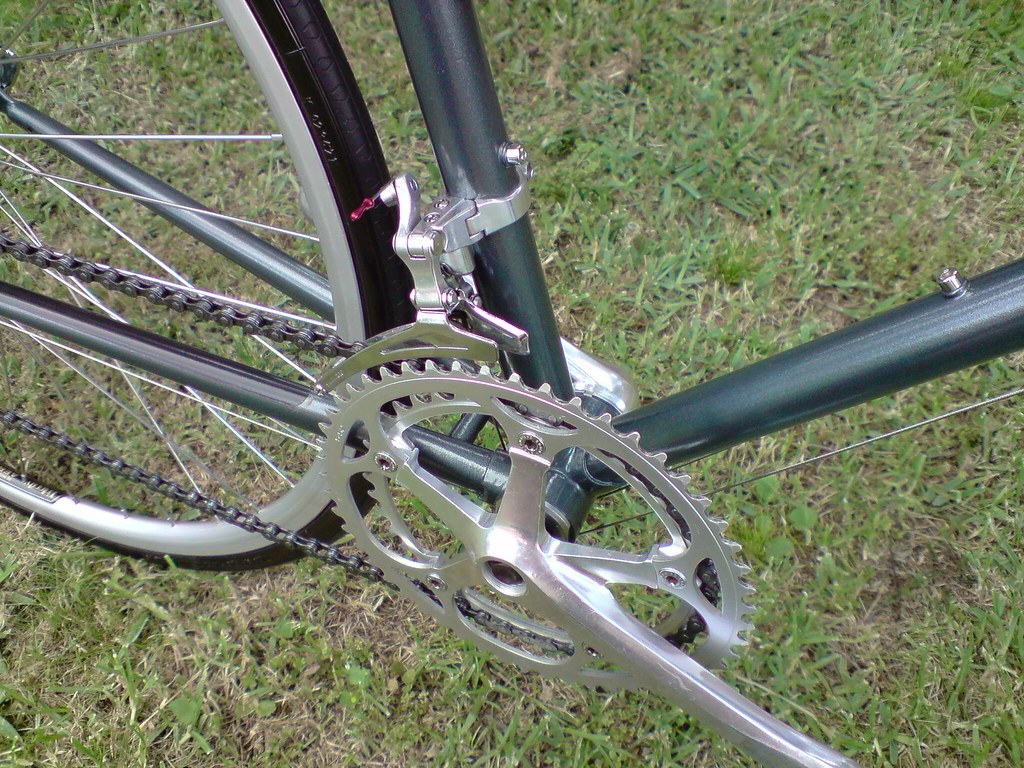
crank, derailer after polishing and fiting with new chain stainless cables and cable cap by markfield_32, on Flickr
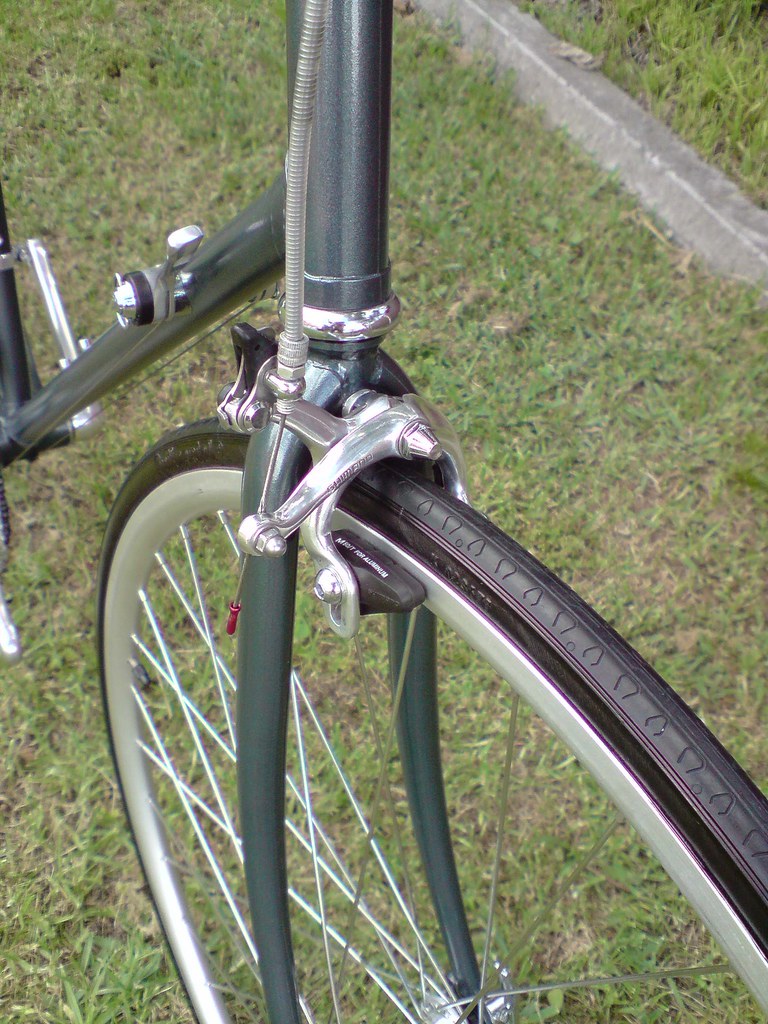
front brake, polished, new pads added by markfield_32, on Flickr
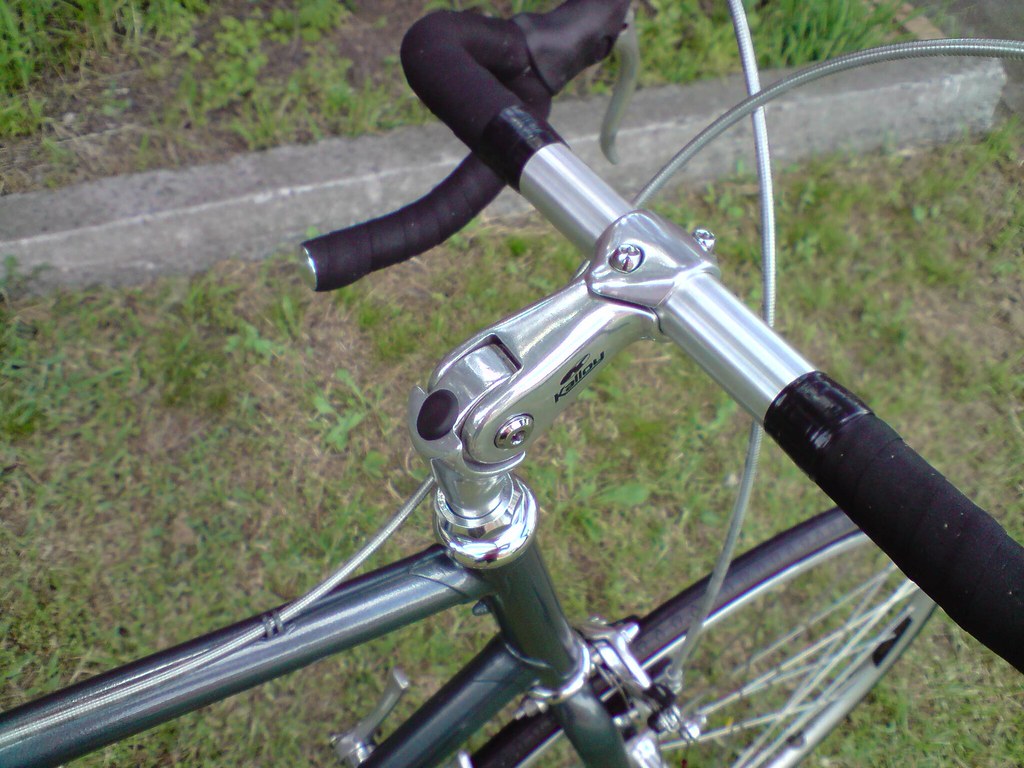
bars polished with wet and dry, new tape, cable housing and stem. by markfield_32, on Flickr
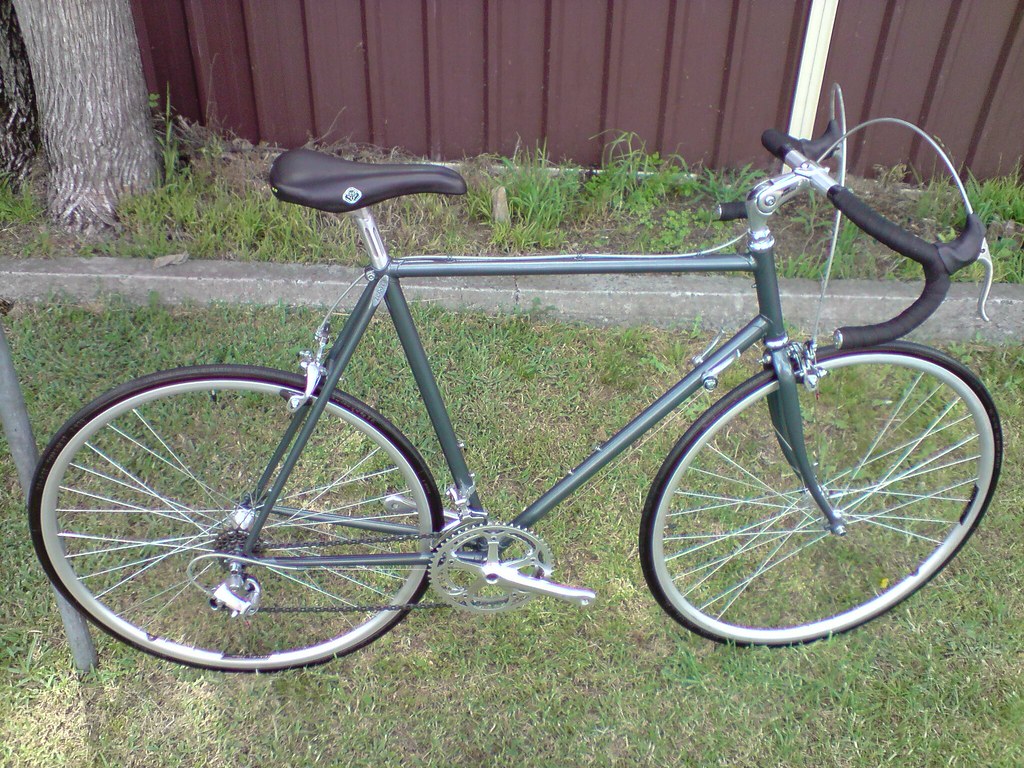
finished bike minus aluminum bottle cage and look pedals by markfield_32, on Flickr
as i foung her on ebay by markfield_32, on Flickr
front with all the good bits by markfield_32, on Flickr
sugino crank by markfield_32, on Flickr
rear derailer by markfield_32, on Flickr
the frame - hanging by a thread. by markfield_32, on Flickr
some nice detail of bottom bracket by markfield_32, on Flickr
rubbed back, primed waiting for sanding and topcoats by markfield_32, on Flickr
seatpost after sanding with fine grade wet and dry. by markfield_32, on Flickr
after dismantling, polishing and re assembly by markfield_32, on Flickr
crank, derailer after polishing and fiting with new chain stainless cables and cable cap by markfield_32, on Flickr
front brake, polished, new pads added by markfield_32, on Flickr
bars polished with wet and dry, new tape, cable housing and stem. by markfield_32, on Flickr
finished bike minus aluminum bottle cage and look pedals by markfield_32, on Flickr
steel is the real deal.
-
familyguy

- Posts: 8381
- Joined: Wed Apr 16, 2008 2:30 pm
- Location: Willoughby, NSW
Re: BEFORE AND AFTER PICS BY ALL RESTORERS
This comes to mind:
Whats the green?
Jim
Whats the green?
Jim
-
mark field
- Posts: 933
- Joined: Fri Dec 17, 2010 8:28 pm
Re: BEFORE AND AFTER PICS BY ALL RESTORERS
jim, i used Powerplus touch up paint 350gm pressure pack the colour is gunmetal and the code on the lid is PK9190. Purchased at Supacheap Auto. and theres two coats of clear to give depth but im a little disapionted with ther finish. All brightwork was refurbished with my Ozito brand 'dremel tool' using the felt pads and autosol polish. Bars were dinted and scratched so i hit them with various size grit wet and dry until i was down to 1200grit.
steel is the real deal.
-
munga
- Posts: 7023
- Joined: Mon Jan 28, 2008 3:17 pm
- Location: wowe
- Contact:
Re: BEFORE AND AFTER PICS BY ALL RESTORERS
lovely work with the components.
some 800 sandpaper on the primer might have helped with the finish coat mark. some swear by heating up the paint a bit too. drop the can/s in a bucket of hot water from the tap (not too hot - you don't want to pop a can of boiling paint onto the laundry ceiling) for a few minutes.
-
familyguy
- Posts: 8381
- Joined: Wed Apr 16, 2008 2:30 pm
- Location: Willoughby, NSW
Re: BEFORE AND AFTER PICS BY ALL RESTORERS
It looks better than new. It looked more green on my work monitor, now I've got it at home, the gunmetal comes out more. Still nice  .
.
Jim
Jim
-
elStado

- Posts: 2363
- Joined: Tue Mar 16, 2010 12:27 am
- Location: Syd, NSW
Re: BEFORE AND AFTER PICS BY ALL RESTORERS
I like this thread. Nice and simple summary of many of the builds going on on the forums.
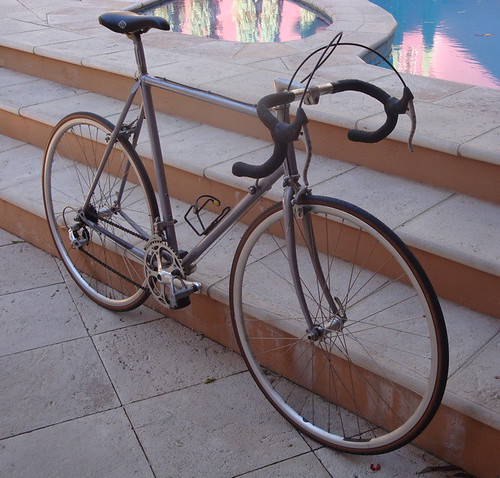
Here's a fixie I converted from an late 80s 10-speed (Biopace) that my friend's dad discovered in the storage shed and gave to me as I was looking for a project bike.
Cost less than $300 including: sandblast + powdercoat, new wheel (with flip flop hub), new tire, wheel tape and tube, new bar tape, new pedals (swapped them out in the end with some others) and new saddle. Rides very nicely and the fixed gear is quite a fun experience. I've been commuting to Uni most days of the week with it and it's been great.
Before:

Rideable condition - no tape yet and flat pedals:

Current:

The first and last pics were taken on mobile phones, so not great quality.
And yes, I am aware that the front tire has a reflective stick out of place. No idea how I botched that but CBF'd fixing it. Adds character I reckon.
Here's a fixie I converted from an late 80s 10-speed (Biopace) that my friend's dad discovered in the storage shed and gave to me as I was looking for a project bike.
Cost less than $300 including: sandblast + powdercoat, new wheel (with flip flop hub), new tire, wheel tape and tube, new bar tape, new pedals (swapped them out in the end with some others) and new saddle. Rides very nicely and the fixed gear is quite a fun experience. I've been commuting to Uni most days of the week with it and it's been great.
Before:
Rideable condition - no tape yet and flat pedals:
Current:
The first and last pics were taken on mobile phones, so not great quality.
And yes, I am aware that the front tire has a reflective stick out of place. No idea how I botched that but CBF'd fixing it. Adds character I reckon.
Check out my practical cycling and cycle touring website: VELOPHILE AUSTRALIA
-
mark field
- Posts: 933
- Joined: Fri Dec 17, 2010 8:28 pm
Re: BEFORE AND AFTER PICS BY ALL RESTORERS
lovely work with the components.
some 800 sandpaper on the primer might have helped with the finish coat mark. some swear by heating up the paint a bit too. drop the can/s in a bucket of hot water from the tap (not too hot - you don't want to pop a can of boiling paint onto the laundry ceiling) for a few minutes.[/quote]
the less than smooth finish is actually the gloss, the primer was sanded smooth with a scotch brite which is my standard method, i find if i use sandpaper to rub back it's easier to wear down to bare metal , the scotchbrite seems to have a cushioning effect in that the pressure of my hand is more evenly distributed.The colour also came out smooth, well smoothish, in hind sight i think had i heated up the cans as per suggested then the paint would have flowed much better. I think i was lucky to have a good bike to start with it was a fairly easy resto- hardest part was putting the bar tape on, as my bikes were always dragster's and bmx's. and i used an artline marker to colour the gumwalls which were not as fresh looking as id liked. id like to know what brand the front derailer is. ive got no idea.
steel is the real deal.
-
munga
- Posts: 7023
- Joined: Mon Jan 28, 2008 3:17 pm
- Location: wowe
- Contact:
Re: BEFORE AND AFTER PICS BY ALL RESTORERS
looks like a shimano Z206 derailleur from about 1986
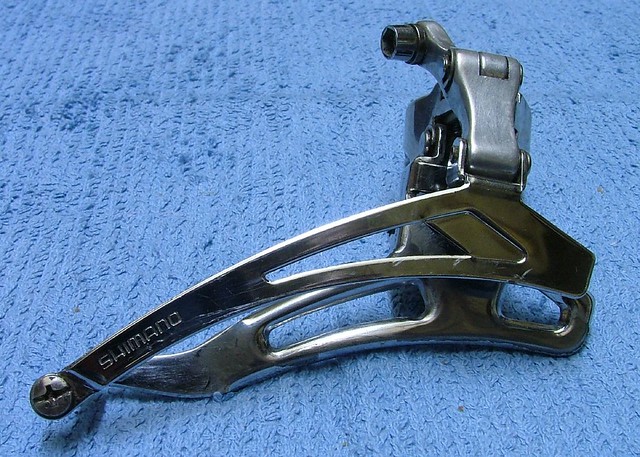
rd looks to be light action L525?

rd looks to be light action L525?
-
mark field
- Posts: 933
- Joined: Fri Dec 17, 2010 8:28 pm
Re: BEFORE AND AFTER PICS BY ALL RESTORERS
munga wrote:looks like a shimano Z206 derailleur from about 1986
rd looks to be light action L525?
steel is the real deal.
-
HappyHumber

- Posts: 5072
- Joined: Wed Nov 14, 2007 11:48 pm
- Location: Perth, (S.o.R.) W.A.
Re: BEFORE AND AFTER PICS BY ALL RESTORERS
Nice work Mark for sure.
I didn't recognise it but thought your RD looked nice & sexy polished up. But since Munga pointed it out as a Light Action - I think I'll go home and look at my Long Cage version on the ol' Kuwahara MTB with a fresh set of eyes
Did you disassemble it much to clean & polish it up?
You'll probably find somewhere on the RD (and most Shimano parts for that matter) a two letter code something like 'K D' which signifies year & month of part manufacture at least. If you find a bike with mostly Shimano parts with codes with 18 months of each other, allowing for stock levels and assembly times on the frame - there's a high probability that they're original.
Last edited by HappyHumber on Thu May 12, 2011 11:13 am, edited 1 time in total.
--
Hit me up via the BNA dm; I'll get an alert. If y'know, you know.
Hit me up via the BNA dm; I'll get an alert. If y'know, you know.
-
leighthebee

- Posts: 441
- Joined: Sat Jun 05, 2010 12:22 pm
Re: BEFORE AND AFTER PICS BY ALL RESTORERS
nice all. keep them coming....
-
mark field
- Posts: 933
- Joined: Fri Dec 17, 2010 8:28 pm
Re: BEFORE AND AFTER PICS BY ALL RESTORERS
thanks, if it came apart, it was pulled apart, i tried to get my $$ worth out of my ozito tool and autosol polish. The bars were the most laboursome as the stamping had to be sanded out due to severe scratching. Now i can hit Illustrator and start on the decals for the derailer.HappyHumber wrote:Nice work Mark for sure.
I didn't recognise it but thought your RD looked nice & sexy polished up. But since Munga pointed it out as a Light Action - I think I'll go home and look at my Long Cage version on the ol' Kuwahara MTB with a fresh set of eyes
Did you disassemble it much to clean & polish it up?
You'll probably find somewhere on the RD (and most Shimano parts for that matter) a two letter code something like 'K D' which signifies year & month of part manufacture at least. If you find a bike with mostly Shimano parts with codes with 18 months of each other, allowing for stock levels and assembly times on the frame - there's a high probability that they're original.
ill check the lettering, thanks for that.
steel is the real deal.
Who is online
Users browsing this forum: No registered users