I sent Mulger Bill a link to these & somebody in Australia won them. Was it you mate?Mulger bill wrote: Pity about the metal cap availability, will suss out ebay.
Shaun
How hard is it to change the inner tube?
- Kid_Carbine
- Posts: 1300
- Joined: Tue Aug 14, 2007 11:35 pm
- Location: Southern Tablelands N.S.W.
Postby Kid_Carbine » Mon Dec 31, 2007 7:34 am
Carbine & SJH cycles, & Quicksilver BMX
Now that's AUSTRALIAN to the core.
- Mulger bill
- Super Mod
- Posts: 29060
- Joined: Sun Sep 24, 2006 2:41 pm
- Location: Sunbury Vic
Postby Mulger bill » Mon Dec 31, 2007 9:19 pm
I wish. Me bloody new paypal account wasn't thru in time for the end Thanks for the tip Chris.
I've saved a search tho' *Fingers crossed*
Shaun
I've saved a search tho' *Fingers crossed*
Shaun
...whatever the road rules, self-preservation is the absolute priority for a cyclist when mixing it with motorised traffic.
London Boy 29/12/2011
- Kid_Carbine
- Posts: 1300
- Joined: Tue Aug 14, 2007 11:35 pm
- Location: Southern Tablelands N.S.W.
Postby Kid_Carbine » Tue Jan 01, 2008 1:35 am
Hilary Stone in the UK seem to have them from time to time, so they do turn up with some degree of frequency.
Better luck next time.
Carbine & SJH cycles, & Quicksilver BMX
Now that's AUSTRALIAN to the core.
- peter
- Posts: 1411
- Joined: Sun Nov 25, 2007 7:39 pm
- Location: sydney
Postby peter » Thu Jan 17, 2008 1:57 pm
I bought a patch kit and attempted to fix the puncture last night but it didn't work. Basically it couldn't stop air from leaking. Strangely the kit doesn't come with any instructions.
I started off by sanding the surrounding area, then applied the glue followed by the patch itself. Tested it after 30 minutes, I can still hear air leaking out from that spot.
Maybe I applied wrong side of the patch, is it the side with silver backing or transparent backing that supposed to kiss the hole?
- sogood
- Posts: 17168
- Joined: Thu Aug 31, 2006 7:31 am
- Location: Sydney AU
Postby sogood » Thu Jan 17, 2008 2:11 pm
After applying a thin layer of vulcanizing agent (glue) to the tube, you need to wait until it's touch dry (3-5mins). Only then can you apply the patch, along with very firm pressure for a minute or so. Some people keep that pressure up for longer time before testing.
Put your tube under water and test it. Identify exactly where the leak is coming from.
Bianchi, Ridley, Tern, Montague and All things Apple
RK wrote:And that is Wikipedia - I can write my own definition.
-
- Posts: 521
- Joined: Sat May 26, 2007 7:25 pm
- Location: NW Sydney
Postby mikeg » Thu Jan 17, 2008 2:13 pm
Peel the foil off before applying the patch - the plastic can be left on the patch to help prevent the excess glue sticking to the tyrepeter wrote:I bought a patch kit and attempted to fix the puncture last night but it didn't work. Basically it couldn't stop air from leaking. Strangely the kit doesn't come with any instructions.
I started off by sanding the surrounding area, then applied the glue followed by the patch itself. Tested it after 30 minutes, I can still hear air leaking out from that spot.
Maybe I applied wrong side of the patch, is it the side with silver backing or transparent backing that supposed to kiss the hole?
Mike
- Bnej
- Posts: 2880
- Joined: Fri Jun 30, 2006 11:43 pm
- Location: Katoomba, NSW
Postby Bnej » Thu Jan 17, 2008 2:14 pm
Start by *lightly* sanding the area around the hole.peter wrote:I bought a patch kit and attempted to fix the puncture last night but it didn't work. Basically it couldn't stop air from leaking. Strangely the kit doesn't come with any instructions.
I started off by sanding the surrounding area, then applied the glue followed by the patch itself. Tested it after 30 minutes, I can still hear air leaking out from that spot.
Maybe I applied wrong side of the patch, is it the side with silver backing or transparent backing that supposed to kiss the hole?
Apply a coat of the cement around the area, larger than the patch not too thick, smear it out with your fingers. Wait until it is dry/tacky to the touch (30 seconds or so usually), you're ready to apply the patch.
Remove the silver foil, leave the clear plastic on. Press the patch firmly over the puncture, with the clear plastic facing up. Once this is done, leave it for a good five minutes or so, the patch will vulcanise with the tube and becomes permanent.
You can leave the clear plastic on (won't do any harm), or if you wait for the patch to set properly you can peel it off as the patch will be firmly set onto the tube.
- europa
- Posts: 7334
- Joined: Sun Jul 16, 2006 10:51 am
- Location: southern end of Adelaide - home of hills, fixies and drop bears
Postby europa » Thu Jan 17, 2008 3:20 pm
They've said it all.peter wrote:Cheers! Have to re-try tonight.
The three biggest causes of repair failure are:
- not letting the glue dry before applying the patch
- putting too much glue on (surface dries, not underneath)
- not patching the only hole
Of course, pinching the tube when putting the whole thing back together again is fairly popular too
Richard
I had a good bike ... so I fixed it
- Mulger bill
- Super Mod
- Posts: 29060
- Joined: Sun Sep 24, 2006 2:41 pm
- Location: Sunbury Vic
Postby Mulger bill » Thu Jan 17, 2008 10:49 pm
Many tubes have mould ridges that can let air escape along them under the patch if you don't press down hard or long enough, easy to check out if you do the Sogood test.
Shaun
Shaun
...whatever the road rules, self-preservation is the absolute priority for a cyclist when mixing it with motorised traffic.
London Boy 29/12/2011
- Kid_Carbine
- Posts: 1300
- Joined: Tue Aug 14, 2007 11:35 pm
- Location: Southern Tablelands N.S.W.
Postby Kid_Carbine » Thu Jan 17, 2008 11:38 pm
After following the instructions to the letter, apply the patch & use the convex face of one end of a tyre lever to firmly rub across the top of the patch, Start at the middle & work your way outward as if you were trying to expell an air bubble in the glue.
Rub lengthwise then crosswise, but keep a firm pressure on the tyre lever. This will help to ensure that the entire surface of the patch is firmly stuck to the tube, ensuring a successfull repair. This is a trick that my stepfather taught me when I was about 10 or so. Once it's done, apply a little french chalk [or talc] to the surface of the patch, or the whole tube, to ensure that any residual stickum does not glue the tube to the inside of the tyre.
There should be no raised ridges or mould lines in the immediate area of the hole because these will have been abraded away when correctly preparing the surface of the tube before gluing [as per the instructions]. Once the patch is on, & firmly pressed in place, there should be a perfect seal at the injury point, but firm rubbing with the tyre lever will also ensure a proper seal at the raised ridges too.
Carbine & SJH cycles, & Quicksilver BMX
Now that's AUSTRALIAN to the core.
- peter
- Posts: 1411
- Joined: Sun Nov 25, 2007 7:39 pm
- Location: sydney
-
- Posts: 521
- Joined: Sat May 26, 2007 7:25 pm
- Location: NW Sydney
Postby mikeg » Fri Jan 18, 2008 1:38 am
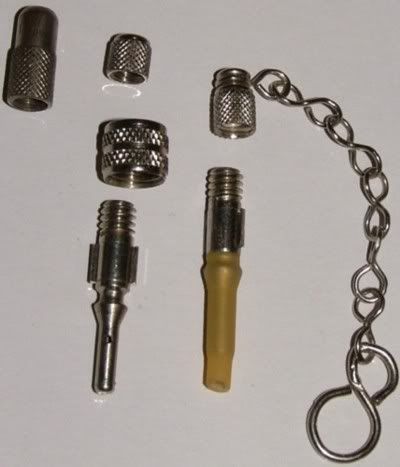
The surgical rubber tube is for Woods or Dunlop valves. it is not needed for schrader (car type) nor presta valves.peter wrote: Now I wonder how do you put the tiny rubber tube inside the valve, can you dismantle the valve easily (or require special tool)?
See the several other threads which has discussed the little rubber tube found in patch kits.
Mike
- Kid_Carbine
- Posts: 1300
- Joined: Tue Aug 14, 2007 11:35 pm
- Location: Southern Tablelands N.S.W.
Postby Kid_Carbine » Fri Jan 18, 2008 10:37 am
Carbine & SJH cycles, & Quicksilver BMX
Now that's AUSTRALIAN to the core.
Jump to
- General Australian Cycling Topics
- Info / announcements
- Buying a bike / parts
- General Cycling Discussion
- The Bike Shed
- Cycling Health
- Cycling Safety and Advocacy
- Women's Cycling
- Bike & Gear Reviews
- Cycling Trade
- Stolen Bikes
- Bicycle FAQs
- The Market Place
- Member to Member Bike and Gear Sales
- Want to Buy, Group Buy, Swap
- My Bikes or Gear Elsewhere
- Serious Biking
- Audax / Randonneuring
- Retro biking
- Commuting
- MTB
- Recumbents
- Fixed Gear/ Single Speed
- Track
- Electric Bicycles
- Cyclocross and Gravel Grinding
- Dragsters / Lowriders / Cruisers
- Children's Bikes
- Cargo Bikes and Utility Cycling
- Road Racing
- Road Biking
- Training
- Time Trial
- Triathlon
- International and National Tours and Events
- Cycle Touring
- Touring Australia
- Touring Overseas
- Touring Bikes and Equipment
- Australia
- Western Australia
- New South Wales
- Queensland
- South Australia
- Victoria
- ACT
- Tasmania
- Northern Territory
- Country & Regional
Who is online
Users browsing this forum: The Great Boffo
- All times are UTC+10:00
- Top
- Delete cookies
About the Australian Cycling Forums
The Australian Cycling Forums is a welcoming community where you can ask questions and talk about the type of bikes and cycling topics you like.
Bicycles Network Australia
Forum Information
Connect with BNA
Brought to you by Bicycles Network Australia | © 1999 - 2024 | Powered by phpBB ®
This website uses affiliate links to retail platforms including ebay, amazon, proviz and ribble.