Repco Olympic 12 into SS Build

christianeh
Posts: 33
Joined: Sun Mar 27, 2011 1:35 am
Location: Brisbane

Repco Olympic 12 into SS Build

Postby christianeh » Mon Oct 17, 2011 12:42 am

I’ve wanted to convert/restore an old bike into a single speed for a while now and I finally got my ass into gear and got started on the weekend, with the help of my brother. I want to build something classy looking and am taking most of my inspiration from the beautiful Montante Maserati 8CTF.

Image

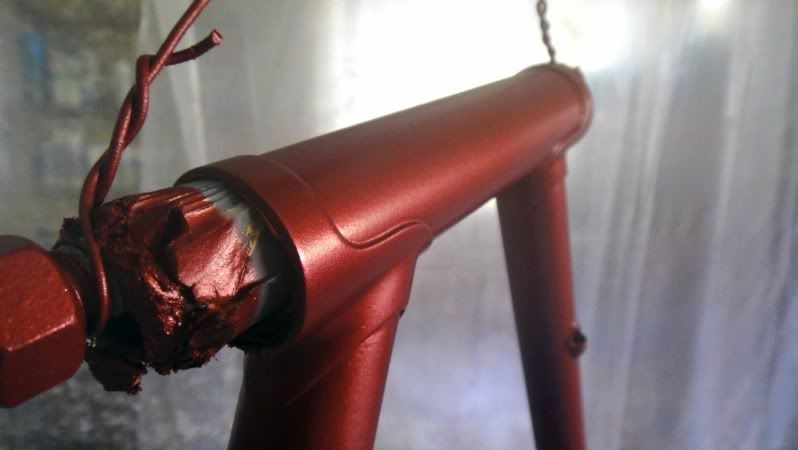
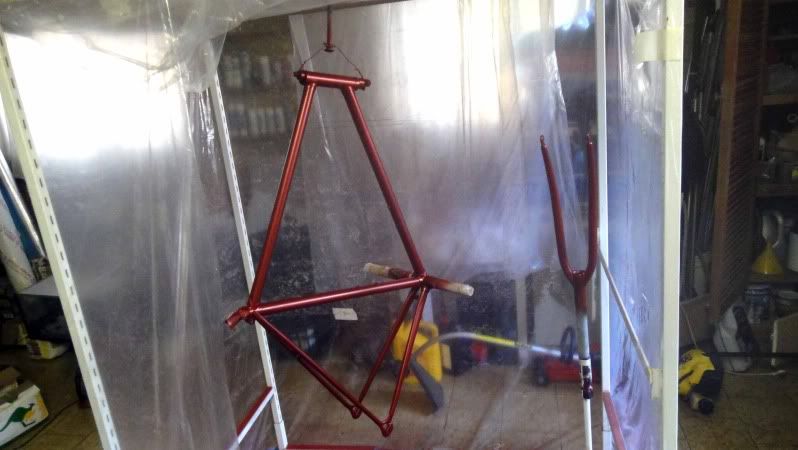
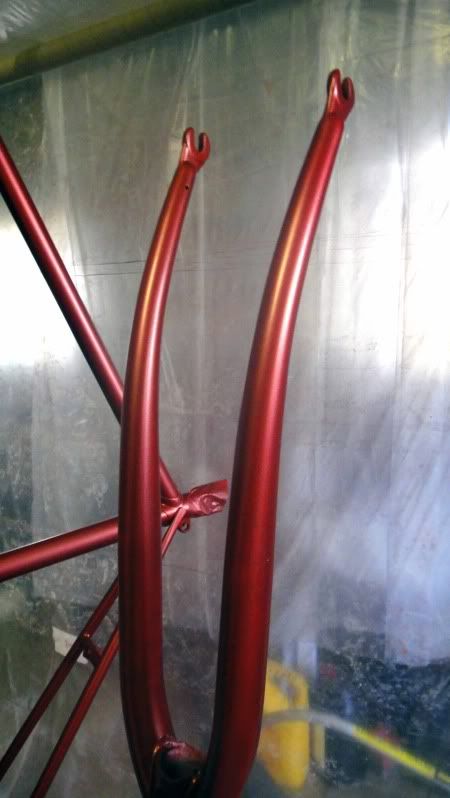
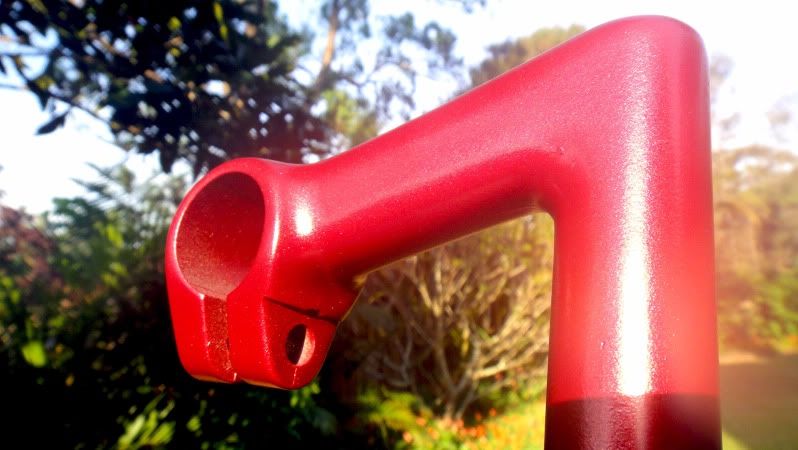
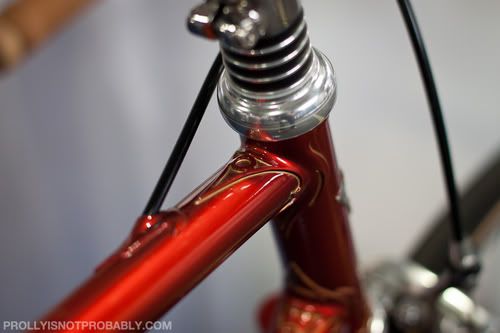
In my head I see a deep metallic red frame with gold pin-striping around the lugs, with lots of chrome/polished aluminium hardware, and gold highlights etc. However, I wouldn’t be surprised at all if this changes during the build.

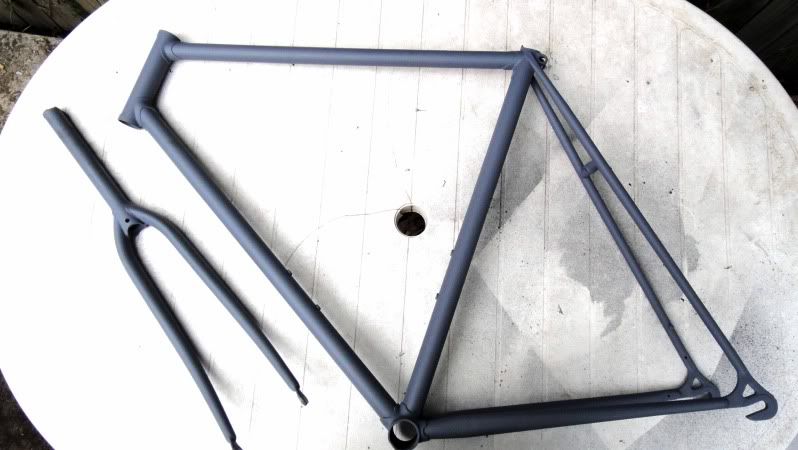
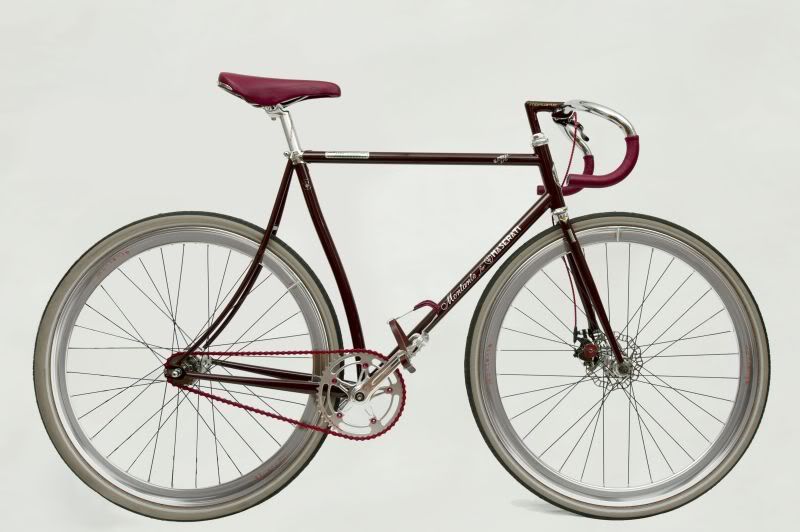
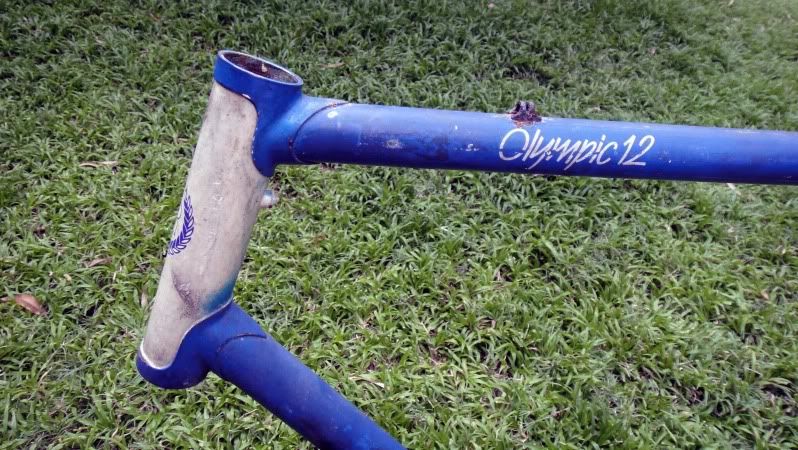
I got an old Repco Olympic 12 off my brother to use as a foundation. It’s a nice steel frame with some simple but cool lugs.

Image
Image
Image

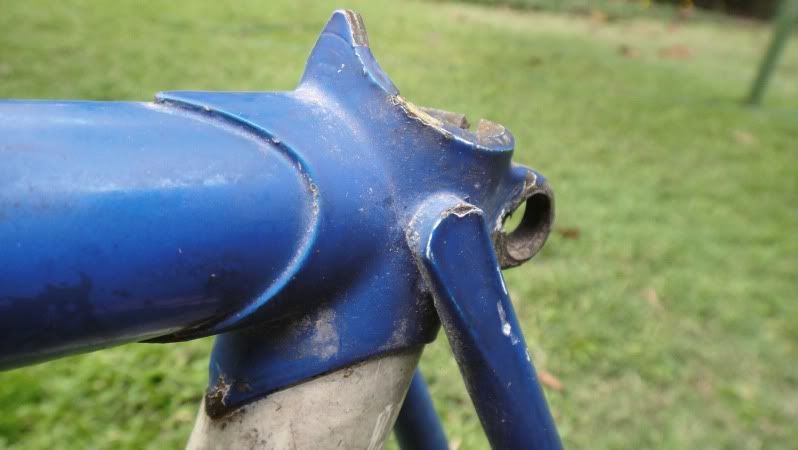
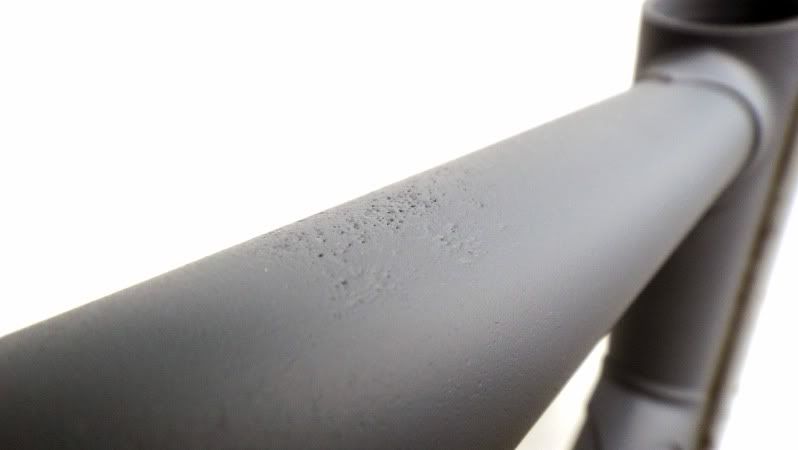
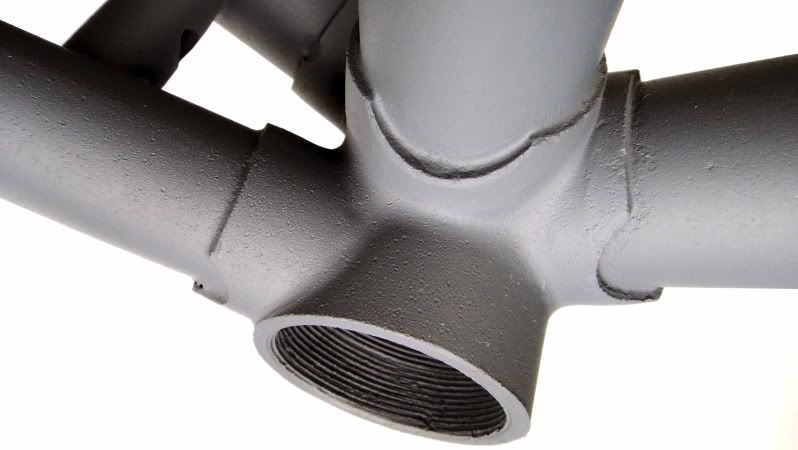
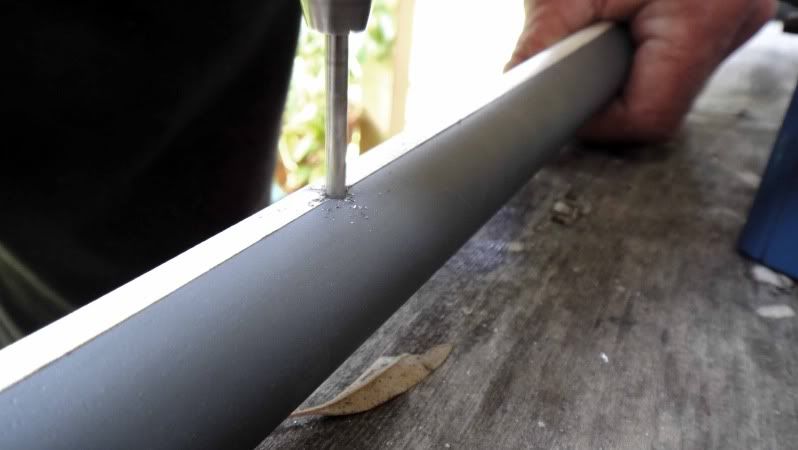
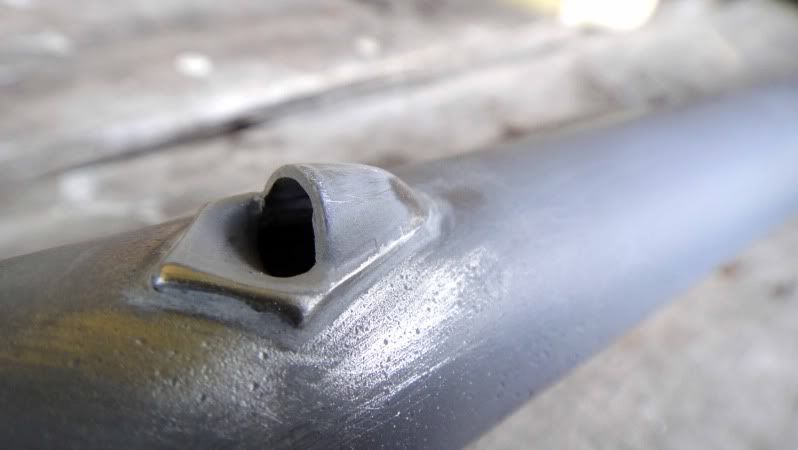
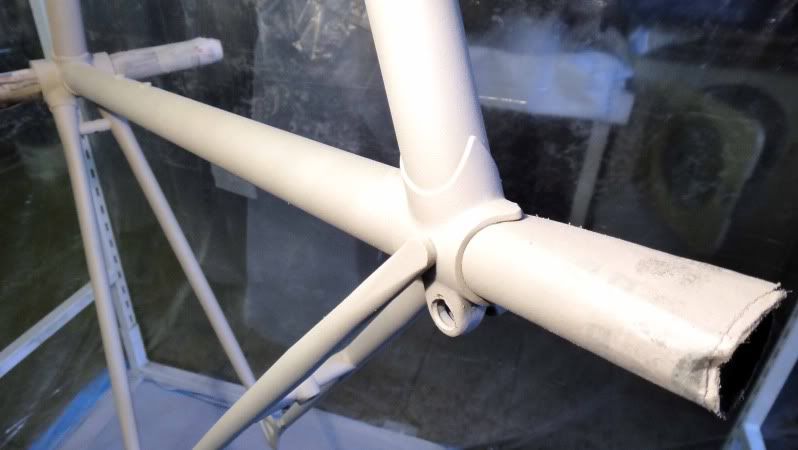
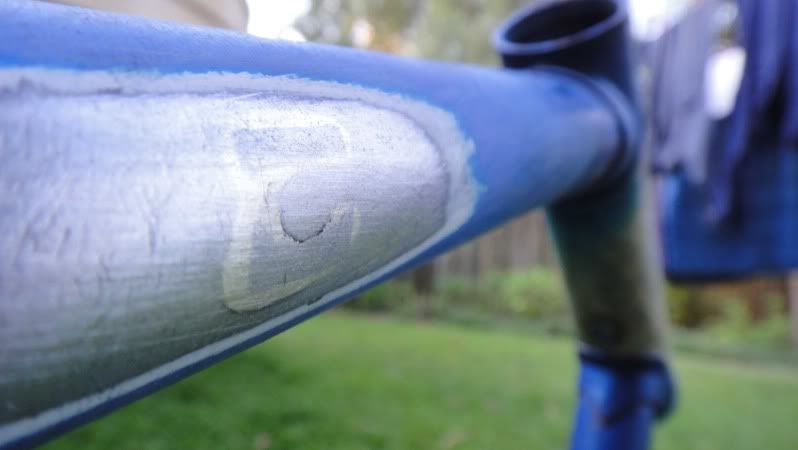
First step was to clean it up and get rid of all the unwanted extra braze-ons (I know many of you will hate me for molesting the frame, but oh well). The cable guides on the top tube were shot to hell so they were the first to go.

Image

We attacked those with the Dremel and managed to cut them off easy enough. A bit of filing and sandpapering and you would never have known they were there. I intend on having internal cabling for the back brake but didn’t get around to doing that today.

Image
Image

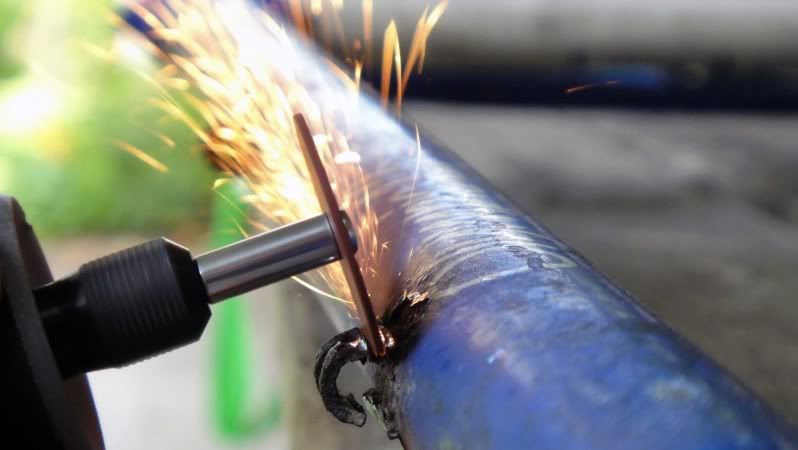
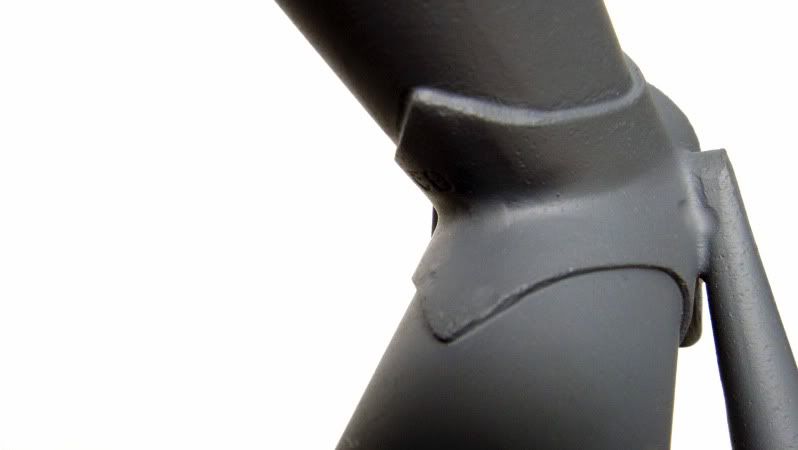
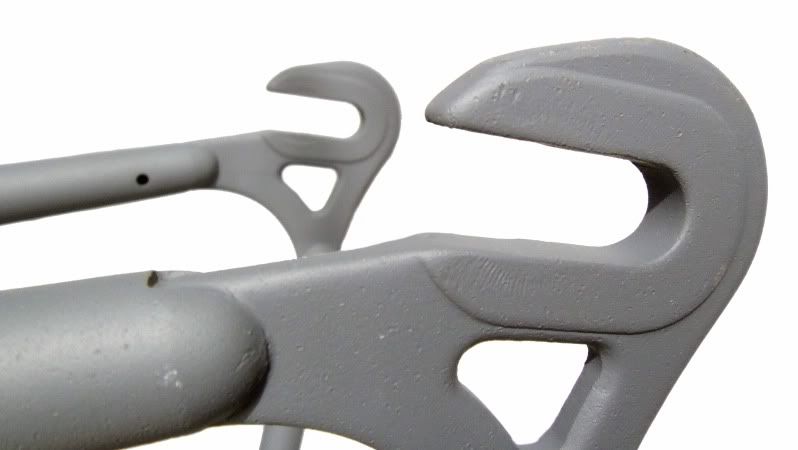
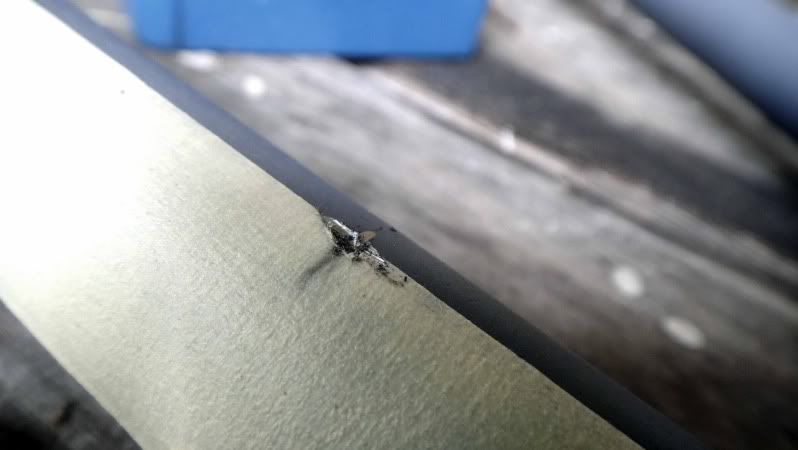
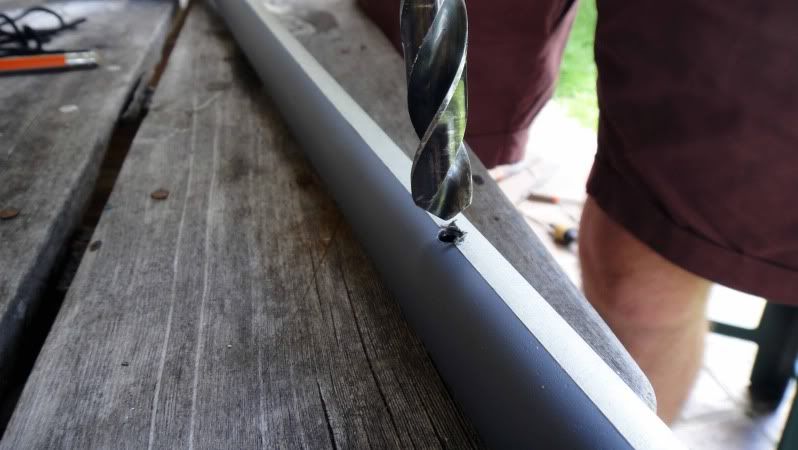
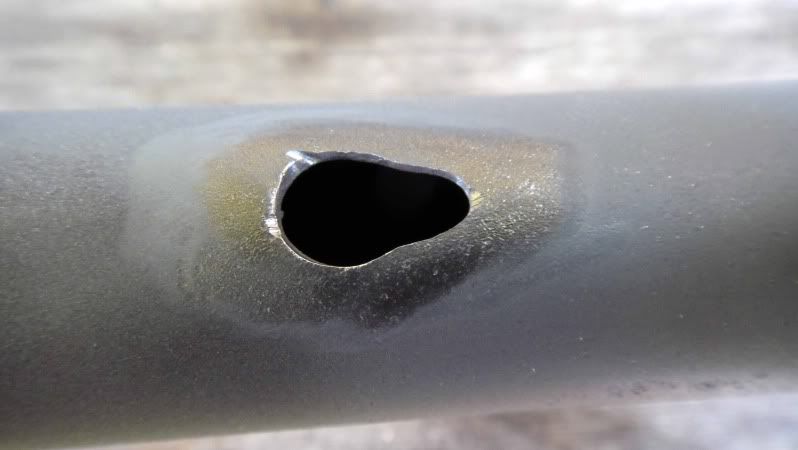
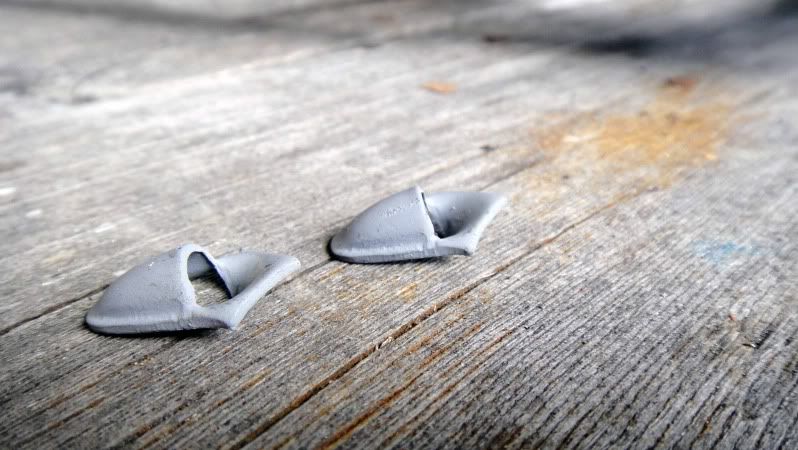
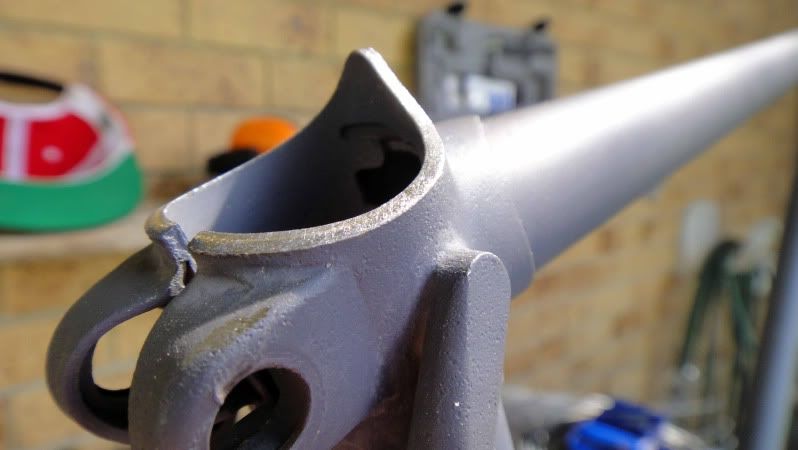
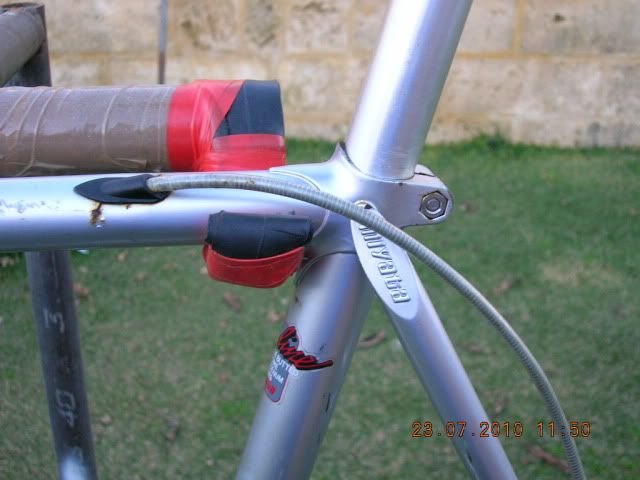
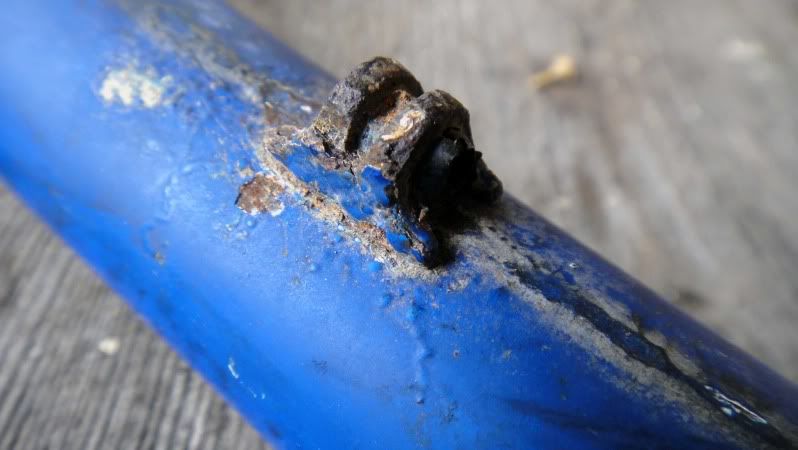
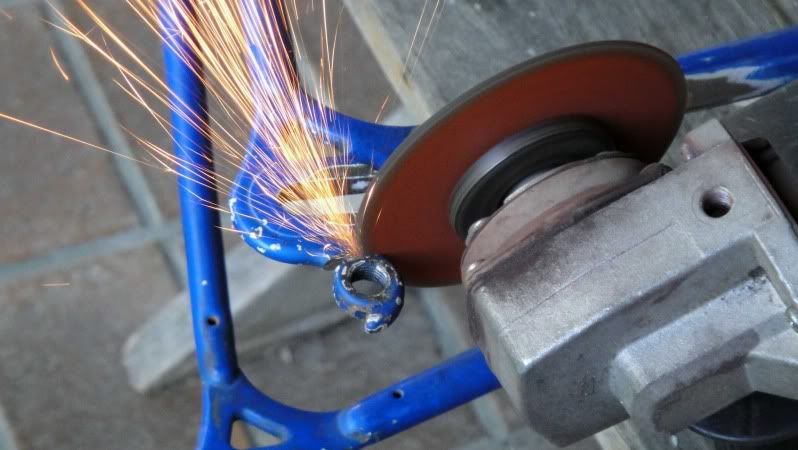
Next up were the down tube shifter bosses and the rear drop-out hanger. We figured these would require slightly more fire-power so we pulled out the big guns and got stuck in to it with the angle grinder.

Image
Image
Image

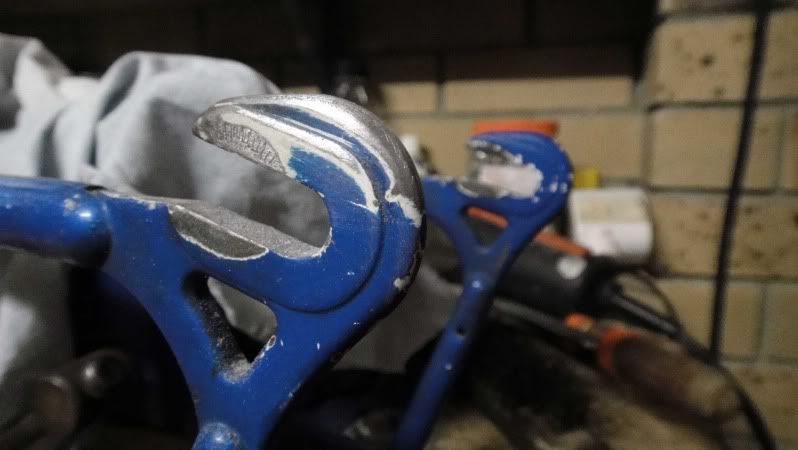
I did some sculpting on the drop-out with the file and managed to get a result that I was fairly happy with.

Image

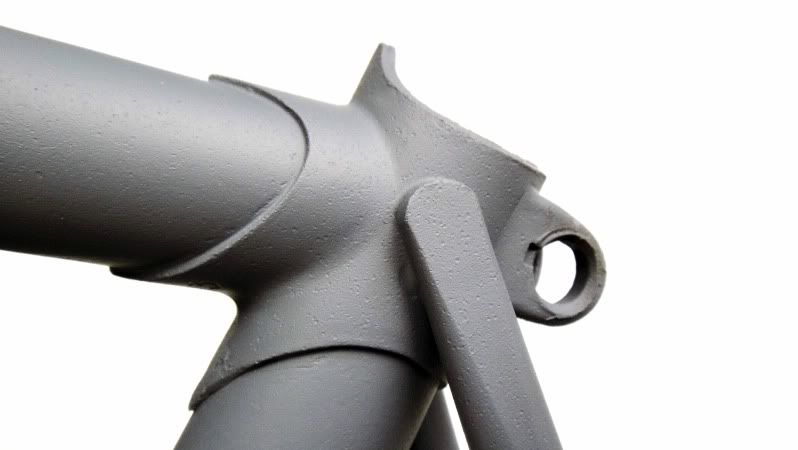
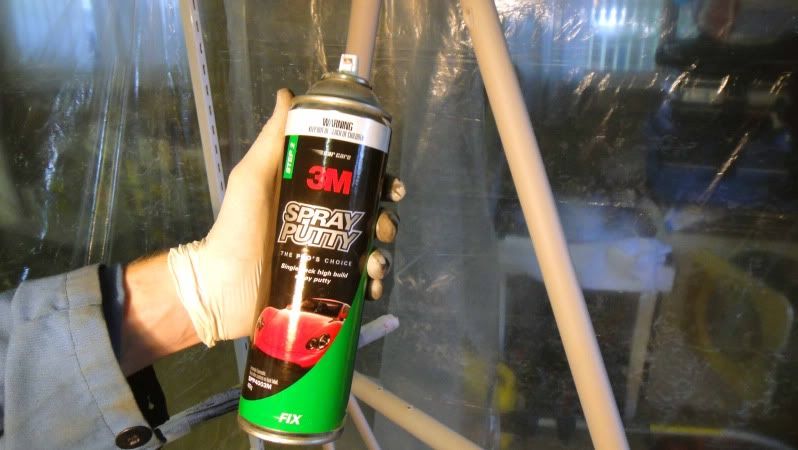
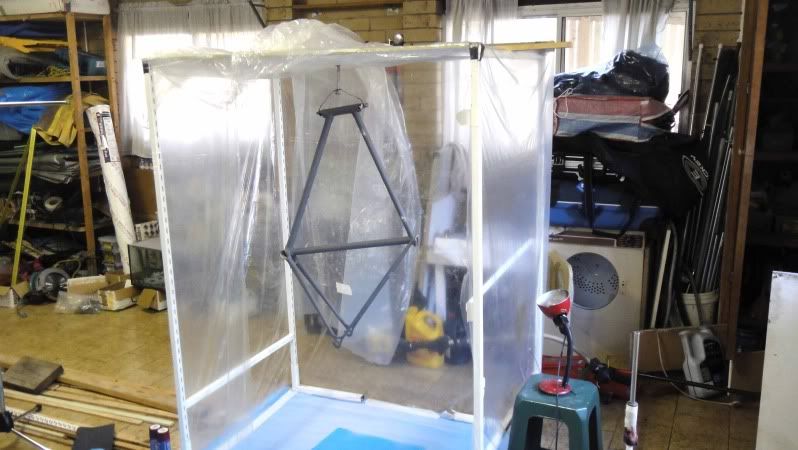
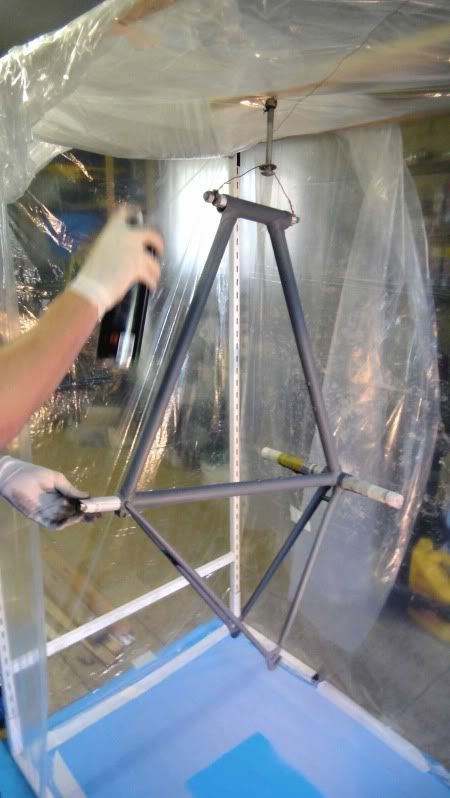
Also got rid of the pump pin on the head tube. I will hopefully be getting it sandblasted this week, ready for a primer next weekend. My brother and I are going to have a go at giving it a paint job with rattle cans in the following weeks. Fingers crossed it turns out alright. If anyone has any tips, suggestions and/or comments please feel free to drop a comment.

User avatar
PeteV
Posts: 167
Joined: Fri Nov 12, 2010 11:01 am
Location: Northern 'burbs, Adelaide

Re: Repco Olympic 12 into SS Build

Postby PeteV » Mon Oct 17, 2011 5:49 pm

I personally don't mind what anyone does to a frame, so long as it is not something super rare or expensive, which the Olympic 12 isn't! The most important think is getting out on it and enjoying it when you are finished. I really dig your motivational picture, that is a sweet looking bike. Good luck with the build, there is plenty of support on here if you run into trouble!

BRLVR.v2
Posts: 725
Joined: Sat Jul 09, 2011 8:33 pm

Re: Repco Olympic 12 into SS Build

Postby BRLVR.v2 » Mon Oct 17, 2011 10:29 pm

Yeah, I drewed a PG shogun frame once and built it up fixed.

User avatar
brasstinman
Posts: 398
Joined: Tue Jan 20, 2009 4:29 pm
Location: Sydney

Re: Repco Olympic 12 into SS Build

Postby brasstinman » Wed Oct 19, 2011 5:58 pm

Nice work, love the pics.
Looking forward to seeing the frame with a lick of paint.

christianeh
Posts: 33
Joined: Sun Mar 27, 2011 1:35 am
Location: Brisbane

Re: Repco Olympic 12 into SS Build

Postby christianeh » Fri Oct 21, 2011 11:57 am

Did a bit of calling around to get some quotes on sandblasting and found that prices varied greatly (one place wanted $80 to blast it!). Managed to find a bloke who could do it for $20 so I crossed my fingers and hoped for the best. He also offered to put a thin coat of primer on it for an extra $5 which I accepted since there has been rain looming the past few days and I thought it would be good to keep the rust at bay. I picked it up yesterday and was rather happy with the result.

Image

As you can see in the following photos, the frame/paint looks a little 'pitted' (not sure if that's the correct term) but hopefully that will get smoothed out with a little light sanding and another coat or two of primer. It's especially noticeable on the top tube where I removed the brake cable guides, which I guess is due to the surface rust that had accumulated around those areas.

Image

The seat lugs cleaned up really well and the edges are nice and sharp. However, there was a small dint/graze on the underside of the seat lug :(

Image

Image

Bottom bracket needs a bit of love with the sandpaper to smooth the edges a bit as they're quite rough.

Image

The drop-outs turned out really good and I can hardly tell which side used to have the hanger on it :D. Only thing is that there is a bit of a pit/gap between the chain-stays and the rear fork-ends. Hopefully the spray putty will fill this up (has anyone done this before?) but if not it is only a minor detail.

Image

Will be sanding it and applying some more primer this weekend. Does anyone have any suggestions as to what brand of paint to go for and where to get it in Brisbane? I am looking for a deep metallic red colour (as a base coat, not as the primer :P) and will be using enamel paint. I've checked out a few of the typical hardware stores without success and reckon I'll have to hit up an auto paint shop. Was also thinking of spraying a light coat of silver before I do the metallic red which might help bring out the metallic colour. I've been doing a bit of reading online about DIY rattle-can paint jobs, so with a little time and effort (and help from my bro) I hope to get a satisfactory finish and possibly get some experience for next time. Any and all tips would be appreciated.

User avatar
HappyHumber
Posts: 5072
Joined: Wed Nov 14, 2007 11:48 pm
Location: Perth, (S.o.R.) W.A.

Re: Repco Olympic 12 into SS Build

Postby HappyHumber » Fri Oct 21, 2011 12:40 pm

Good documentation work.... it helps inspire others! :)
--
Hit me up via the BNA dm; I'll get an alert. If y'know, you know.

BRLVR.v2
Posts: 725
Joined: Sat Jul 09, 2011 8:33 pm

Re: Repco Olympic 12 into SS Build

Postby BRLVR.v2 » Fri Oct 21, 2011 5:38 pm

Rustoleum hammermilled paints hide plenty of imperfections. Used it on my drewed shogun.
http://s138.photobucket.com/albums/q245 ... n%20fixed/

Ozkaban
Posts: 1101
Joined: Wed Sep 07, 2011 1:18 pm
Location: Sydney

Re: Repco Olympic 12 into SS Build

Postby Ozkaban » Fri Oct 21, 2011 5:46 pm

Will watch this build with interest. Love the inspiration pic. I guess you can't do the curved seat stays but they look oh so elegant!

Looking good so far.

Cheers,
Dave

christianeh
Posts: 33
Joined: Sun Mar 27, 2011 1:35 am
Location: Brisbane

Re: Repco Olympic 12 into SS Build

Postby christianeh » Fri Oct 21, 2011 6:13 pm

BRLVR.v2 wrote:Rustoleum hammermilled paints hide plenty of imperfections. Used it on my drewed shogun.
Thanks for the tip, pal. Will look into it.

HappyHumber wrote:Good documentation work.... it helps inspire others! :)
This is my first build, and also my first bike since I was a kid and rode a Bully Piston BMX, so I was hoping that I would be the one getting the inspiration haha :D

User avatar
PeteV
Posts: 167
Joined: Fri Nov 12, 2010 11:01 am
Location: Northern 'burbs, Adelaide

Re: Repco Olympic 12 into SS Build

Postby PeteV » Sat Oct 22, 2011 8:38 am

If you don't want to use hammermill paint, another option is to spray a light coat of spray putty over the primer, rub it back and then apply another coat, etc til the blemishes are filled. it's a pain in the ass, time consuming job and you will never want to paint another frame! If you can get hammermill in a dark red/burgandy, I think it will look pretty schmick.

Ozkaban
Posts: 1101
Joined: Wed Sep 07, 2011 1:18 pm
Location: Sydney

Repco Olympic 12 into SS Build

Postby Ozkaban » Sat Oct 22, 2011 9:01 am

PeteV wrote:If you don't want to use hammermill paint, another option is to spray a light coat of spray putty over the primer, rub it back and then apply another coat, etc til the blemishes are filled. it's a pain in the ass, time consuming job and you will never want to paint another frame
I was thinking that too. Worth giving it a go as that primer looks pretty thin.

Cheers,
Dave

christianeh
Posts: 33
Joined: Sun Mar 27, 2011 1:35 am
Location: Brisbane

Re: Repco Olympic 12 into SS Build

Postby christianeh » Wed Oct 26, 2011 4:59 pm

I gave the primer a quick sand with 600 grit wet or dry a few days after I got it back from the sandblasters. Before I could do a coat of spray putty I had a few things to do. I started off by 'installing' the internal cable guides for the rear brake cable. To position them I used masking tape to get a straight line along the left hand side of the top tube, marked where I wanted them (approximately 8cm in from each end), then made a notch in the tube with the Dremel so I could drill the holes.

Image

Image

I used a small drill-bit before opening it up further with a larger drill-bit.

Image

Did some further sculpting with the Dremel to get that tear drop shape then sanded the immediate area before giving it a wipe down with wax and grease remover.

Image

Bought these puppies off eBay for a few bucks. I was only able to find one person that sold them. I have no idea where else to get them so I bought an extra set in case I wanted to build another bike in the future.

Image

Used some epoxy paste to glue the suckers on. After leaving that to dry and harden for about an hour I cleaned up the edges and overspill.

Image

Image

While sanding back the primer a few days ago I noticed that the top of the seat cluster needed some love. In the photo below (sorry about the bad focus) you can see two plies of steel from the seat tube and the seat lug so I filed it back and it is now nice and even :D

Image

Image

Time build to build a spray booth. I bought some plastic drop sheets from Supercheap and used two stands we had lying around to set this up in my parents garage. Hopefully a relatively sheltered and dust free environment suitable for painting.

Image

I used some 3M Spray Putty that my brother had lying around, making sure to warm up the can in some warm water and gave it a good shake. The forks were the first to get a coat. I wiped it down thoroughly with wax and grease remover and used an old microphone stand from my band days to hold the forks while I painted them.

Image

Image

Forks turned out a treat so next up was the frame. I had a bit of a dilemma here about how to mount the frame so that I could spin it around to paint all sides. Devised a plan using some bolts and wire and managed to fashion a crude swivel! I stuffed the bottom bracket and seat tube with rolled up newspaper to avoid getting paint in there. I also found out this was a great idea as I could now turn the frame and hold it stable without having to touch the frame.

Image

Image

Image

I tried following all the tips I'd read on the net about paint, for example starting to spray before I hit the frame and finishing after, spraying at a distance of 15-20cms etc. I laid it on a bit thicker on the top tube where it was pitted. It was good fun giving it a go and I was pleased with the outcome. It was also a good learning curve for when I do the base and clear coat. Another successful Sunday.

Image

Today I sanded the spray putty and chucked on another coat of primer and also put a primer on the stem.

Image

Will be laying down the base coat this weekend. Fingers crossed that it turns out alright. Will post photos when that's done.

User avatar
HappyHumber
Posts: 5072
Joined: Wed Nov 14, 2007 11:48 pm
Location: Perth, (S.o.R.) W.A.

Re: Repco Olympic 12 into SS Build

Postby HappyHumber » Wed Oct 26, 2011 5:30 pm

mmm the "Steel Reinforced Epoxy Paste" must be the equivalent of what I keep seeing yanks refer to as "JB Weld".
All manner of dodgy fixed gear conversions made with it I think when I first was reading up on bikeforums.net ;)

I often wondered what the more generic name for the product was and what it was called here
--
Hit me up via the BNA dm; I'll get an alert. If y'know, you know.

User avatar
brasstinman
Posts: 398
Joined: Tue Jan 20, 2009 4:29 pm
Location: Sydney

Re: Repco Olympic 12 into SS Build

Postby brasstinman » Wed Oct 26, 2011 8:22 pm

Looking good, like the internal cable routing.

User avatar
BLU_FZ!
Posts: 410
Joined: Sun Sep 27, 2009 10:17 am
Location: Perth?

Re: Repco Olympic 12 into SS Build

Postby BLU_FZ! » Fri Oct 28, 2011 12:09 pm

HappyHumber wrote:mmm the "Steel Reinforced Epoxy Paste" must be the equivalent of what I keep seeing yanks refer to as "JB Weld".
All manner of dodgy fixed gear conversions made with it I think when I first was reading up on bikeforums.net ;)

I often wondered what the more generic name for the product was and what it was called here
"Devcon"
"Him"-You do realize that you now own one of the rarest of all high end Nishikis ever produced?"Me"-But its still a Repco mate
Image

christianeh
Posts: 33
Joined: Sun Mar 27, 2011 1:35 am
Location: Brisbane

Re: Repco Olympic 12 into SS Build

Postby christianeh » Fri Oct 28, 2011 2:39 pm

I'm about to place an order for some parts from the glorious nation of US and A from a site called velomine.com
I'm looking at getting:
- Wheelset Velocity B43's in bright silver, radial laced front
- Shimano SF-1200 Freewheel 18 tooth for 1/8" chain
- Shimano Dura Ace Track Cog 16 tooth for 1/8" chain
- Shimano Dura Ace NJS Track Cog Lockring
- KMC Gold Track Chain 1/8"

All up, including postage, it's will to cost about $350. I'm going to source handle bars and head set from a local store. I will also use an existing crankset, brakes, saddle and stem but will be looking to upgrade as the wallet permits. Wiggle has a pair for about of Miche brakes for $28 that seem to be alright, from what I've read about them. Any suggestions for some good websites?

emilmh
Posts: 75
Joined: Tue Aug 31, 2010 3:38 pm

Re: Repco Olympic 12 into SS Build

Postby emilmh » Fri Oct 28, 2011 8:10 pm

Can anyone confirm if the Shimano SF-1200 freewheel http://www.velomine.com/index.php?main_ ... 8rs8i9llb2is compatible with the hub? The fact that it mentions the thread pitch 1.370 x 24tpi makes me question it.

User avatar
HappyHumber
Posts: 5072
Joined: Wed Nov 14, 2007 11:48 pm
Location: Perth, (S.o.R.) W.A.

Re: Repco Olympic 12 into SS Build

Postby HappyHumber » Fri Oct 28, 2011 8:18 pm

That's a standard threading. I don't recall you mentioning what hubs were on the wheels.... but you'll be right.

There's some anomalies with some of the brands with regards to the threading on the lock rings (Miche.. and maybe Campy, I think) but the actual thread for the fixed cog itself and any freewheels have been pretty well standardised for some years now.
--
Hit me up via the BNA dm; I'll get an alert. If y'know, you know.

christianeh
Posts: 33
Joined: Sun Mar 27, 2011 1:35 am
Location: Brisbane

Re: Repco Olympic 12 into SS Build

Postby christianeh » Fri Oct 28, 2011 8:48 pm

The hubs are called 'Formula' and I'm pretty sure they are as per the following...
http://www.formulahubs.com/en/formula/? ... il&aid=115

However, even on the company's site it doesn't even list the specifications. I emailed the dude that I'm buying the wheels off with regards to whether the freewheel is compatible so I should get an email back from him soon.

User avatar
BLU_FZ!
Posts: 410
Joined: Sun Sep 27, 2009 10:17 am
Location: Perth?

Re: Repco Olympic 12 into SS Build

Postby BLU_FZ! » Fri Oct 28, 2011 11:31 pm

You will be fine with the freewheel,, i got my Velocity wheels from Ben at Velomine and got the same parts as you have ordered
Ride more and worry less
"Him"-You do realize that you now own one of the rarest of all high end Nishikis ever produced?"Me"-But its still a Repco mate
Image

User avatar
BLU_FZ!
Posts: 410
Joined: Sun Sep 27, 2009 10:17 am
Location: Perth?

Re: Repco Olympic 12 into SS Build

Postby BLU_FZ! » Sun Oct 30, 2011 12:09 pm

After having some frames develope cracks from internal cable routing without braze ons,im a little scared that with your solder in a tube method will cause fatigue in those immediate areas. imho i would spend a few dollars having the braze-ons soldered,this will minimise the risk of the tube flexing and creating fatigue fractures and the possibility of a major injury to yourself, in saying that! its your bike and you do as you plz.Do keep an eye on those 2 locations though,cracking in the paint is a sure sign something is amiss.

Im sure a ticketed welder could chime in with his thoughts,,,, one that knows the diff between brazing and silver soldering. If you lived in Perth i would do the job for you.As they say,,,skin grows back.Plz be carefull

Image
"Him"-You do realize that you now own one of the rarest of all high end Nishikis ever produced?"Me"-But its still a Repco mate
Image

christianeh
Posts: 33
Joined: Sun Mar 27, 2011 1:35 am
Location: Brisbane

Re: Repco Olympic 12 into SS Build

Postby christianeh » Mon Oct 31, 2011 11:32 pm

BLU_FZ! wrote:After having some frames develope cracks from internal cable routing without braze ons,im a little scared that with your solder in a tube method will cause fatigue in those immediate areas.
Unfortunately I've already painted it (all it needs is a clear coat) so I don't think I'll be brazing them on. But thanks for the suggestion and I'll definitely keep an eye on those areas. Have you had any further problems other than the cracks? How hard were you riding and how long did it take for the frame to develop those cracks?

User avatar
BLU_FZ!
Posts: 410
Joined: Sun Sep 27, 2009 10:17 am
Location: Perth?

Re: Repco Olympic 12 into SS Build

Postby BLU_FZ! » Tue Nov 01, 2011 12:00 am

christianeh wrote:
BLU_FZ! wrote:After having some frames develope cracks from internal cable routing without braze ons,im a little scared that with your solder in a tube method will cause fatigue in those immediate areas.
Unfortunately I've already painted it (all it needs is a clear coat) so I don't think I'll be brazing them on. But thanks for the suggestion and I'll definitely keep an eye on those areas. Have you had any further problems other than the cracks? How hard were you riding and how long did it take for the frame to develop those cracks?

The frame is a bin job,or at the least throwing more money in repairs than its worth.The bike is a roadie, so not ridden hard,mainly cycleways with minimal road use.The frame is a 88 model, so 23 years old.I reckon it was due to the continual up and down flex of the top tube. Like i say,,,keep that in the back of you mind
"Him"-You do realize that you now own one of the rarest of all high end Nishikis ever produced?"Me"-But its still a Repco mate
Image

christianeh
Posts: 33
Joined: Sun Mar 27, 2011 1:35 am
Location: Brisbane

Re: Repco Olympic 12 into SS Build

Postby christianeh » Tue Nov 01, 2011 12:31 pm

Painted the base coat over the weekend. I got a metallic red from Autobahn and did about 4 light-ish coats. I managed to avoid any runs but did get some particles and crap on the frame. It should be ok though when I go over it with a really fine grit sandpaper. I like the colour and am happy with the result. I'm going to let it cure until maybe Thursday or Friday and then sand it. The photo's didn't turn out very good as I've only got a point and shoot camera but you get the general idea. All the outside shots turned out useless as the reflection from the sun made it really blurry.

Image

Image

Image

Image

I want to do some gold pin-striping around the lugs. I want it to look similar to this...

Image

I've heard that some people do this after the clear coat but I don't see any benefit to that. I would have thought that it would be done before the clear coat to protect it. Anyway, I will give that a go after I've sanded it. Clear coat goes on this weekend if all goes to plan :D

User avatar
jaseyjase
Posts: 2994
Joined: Tue Apr 21, 2009 2:00 pm
Location: Perth

Re: Repco Olympic 12 into SS Build

Postby jaseyjase » Tue Nov 01, 2011 1:50 pm

i think a polished stem would look better rather then painted.

but the gold on red is a good choice :wink:

Who is online

Users browsing this forum: No registered users