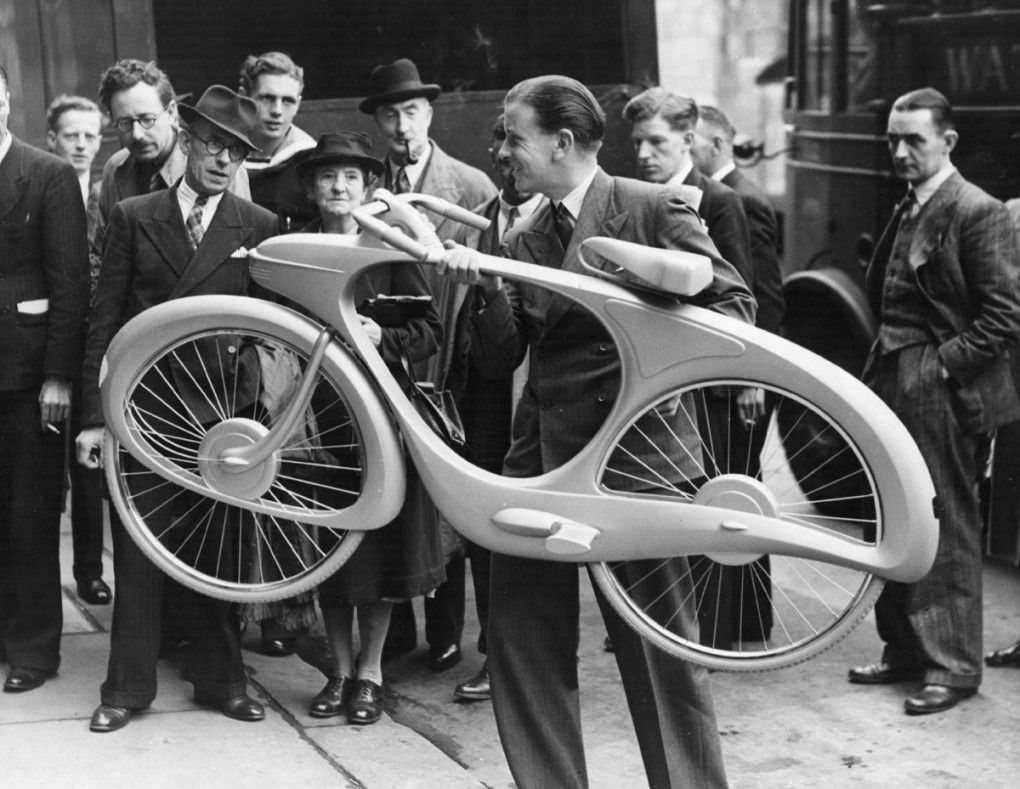
Technique Sports Superbike

User avatar
QuangVuong
Posts: 1794
Joined: Sun Feb 24, 2013 5:04 pm
Location: Villawood, Sydney

Technique Sports Superbike

Postby QuangVuong » Tue May 05, 2015 2:15 pm

This is my Superbike. Apparently never ridden before, only has been built up as display before. The previous owner acquired the frame through the CEO of Technique Sports, who had 3 of those frames lying around.It was originally a white frame, which was hydroblasted and powdercoated black, which is a shame.
Image

From the little information I could find, this is an aluminium frame sold by Technique Sports in Melbourne, dubbed the SuperbikeMarkOne, which is largely based off the 2nd generation carbon Superbike that RMIT designed. They came in a range of sizes(51, 52, 53, 54, 55, 56), my one measuring in at 59cm centre of BB to top of the seat post clamp, and ~54 cm horizontal length from the centre of the HT to the centre of the ST. The frame I believe is made up of two main halves which were welded together, and then the head tube, bottom bracket shell, rear brake bridge/mount, and dropouts were welded in. These sections were pressed and welded by Bocar in Queensland, before they went out of business, and apparently the tooling went for scrap. On my particular frame, there is full internal guided routing through the frame, for the rear brake, and both derailleurs. I also believe that there was never a fork made specifically for these frames. All the examples I have seen all had different forks, but I have noticed that a fair few had Columbus headsets.The fork attached to the frame now is a bladed aluminium fork with a steel steerer, but I also did recieve a 3T Funda carbon fork too, neither of which are original to the frame.

HT welds looks to be filed down a bit, but it still is obvious up close.
Image

BB weld was not filed down. You can see the space for the FD with the cable exit hole, and the missing FD tab. Also note the bubbles or something in the powdercoat finishing.
Image

Seatpost clamp for 27.2 posts.The top of the seattube is a flat piece which is welded on. The weld is filed down, but a small bulge can still be seen running along the edge.
Image

Rear brake bridge is also welded in. Welds on the outside are nicely hidden.
Image

And the otherside. This in in the rear wheel well, and all the welding was left as is.
Image

And one long weld joining the two halves.
Image

Underside of the BB area. There's a weld there, but I'm not sure what it's holding together. There also is either a drain hole, or a vent hole to help dissipate the heat from welding.
Image

Rear dropout with untouched weld.
Image

There is a serial on the bottom of the NDS dropout. Reads 58 B00381. Don't know if it signifies anything since no one else has mentioned theirs.
Image

The other serial number is located under the seatpost clamp. Also the matching serial.
Image

Internal routing. Hole on the left of the picture is the RD, middle for FD, and on the right side is the rear brake.
Image

And exit hole for the RD. there is a cable stop about 1cm in. So it runs housing from the shifter all the way to the cable stop near the end. Then another piece of housing from the stop to the RD.
Image

The original Superbike project began in 1992 and were used up until around 1997 before the UCI rules changed, and the frame design became illegal. Those were produced by Bike Technologies in Melbourne and a production frame/fork-handlebar combination sold for between A$2,300-3,500 bare. I'm not 100% sure on when the Technique Sports frames were produced, but I believe that they were actually made right up until about 2008, which wasn't too long ago. The review linked below states that they were sold with either Ultegra or Dura Ace parts. If this came out in the early 2000s, then it would be running 9s(6500 or 7700) stuff, but the review was written in 2006, when 7800 and 6600 groups had just come out. EDIT: Found this ad in the Australian Cyclist Magazine(Oct 07) which is selling an 18 month old Superbike which has a 10s DA group. Means 7970 Di2 aint too far off.

This was the latest screenshot of the SuperBikeMark1.com site, back from January 2008. I believe this was the main site for the Superbike, but there was also the http://www.techniquesports.com.au" onclick="window.open(this.href);return false; site which was one of the decals on the frame. There is also a link which leads to a Cycling News review of the bike in 2006.
Image

One of the features is lightweight. My bare frame weighs in at ~2300g, which is not that light at all, but then again, this frame is a chunk of aluminium, not a couple thin tubes. But the aerodynamic feature seems about right. The frame does look chunky from the side, but front on, it is quite skinny.
Image

Anyway, the plan for now, is to leave the black powdercoat on it, and build it up with a 7400 group. Later on, it will be repainted, in a scheme that I haven't thought of yet, and I will see if I can get some Di2 onto it. The only thing that would prevent me from doing so would be the size of the FD which has a massive motor on top. The pressed in section on the frame was designed for a traditional braze on FD, and the Di2 FD may not even fit.

Now, the important question, drops or bullhorns? This is a temporary test fit of a stem I had lying around. I'll probably be using a negative rise(-25degree) stem that's about 100mm.
Image

Image

And I'll just chuck this here. Rear disc, 60mm front, and modern bullhorn and aerobar set up.
Image
Last edited by QuangVuong on Tue May 05, 2015 3:53 pm, edited 4 times in total.
VillaVelo, by the Vuong brothers

Blog: https://villaveloframes.wordpress.com/
FB & IG: @villaveloframes

User avatar
utedeej
Posts: 757
Joined: Wed Jan 11, 2012 3:56 pm
Location: Near Canberra

Re: Technique Sports Superbike

Postby utedeej » Tue May 05, 2015 3:03 pm

Nice one QV - rear disc looks the business.

User avatar
find_bruce
Moderator
Moderator
Posts: 10599
Joined: Mon May 09, 2011 8:42 pm
Location: Sydney

Re: Technique Sports Superbike

Postby find_bruce » Tue May 05, 2015 3:20 pm

Great write up Quang. How about a face for the headtube, because I have always thought the design looks like a person on their hands and knees, particularly evident in the first photo :D
Anything you can do, I can do slower

User avatar
QuangVuong
Posts: 1794
Joined: Sun Feb 24, 2013 5:04 pm
Location: Villawood, Sydney

Re: Technique Sports Superbike

Postby QuangVuong » Tue May 05, 2015 3:35 pm

Are you talking about something like this? Stick Face by Bikalangelo
Image
VillaVelo, by the Vuong brothers

Blog: https://villaveloframes.wordpress.com/
FB & IG: @villaveloframes

User avatar
HappyHumber
Posts: 5072
Joined: Wed Nov 14, 2007 11:48 pm
Location: Perth, (S.o.R.) W.A.

Re: Technique Sports Superbike

Postby HappyHumber » Tue May 05, 2015 3:47 pm

find_bruce wrote:...looks like a person on their hands and knees, particularly evident in the first photo :D
Me thinks there might be some innuendo in that somehow too ;)
--
Hit me up via the BNA dm; I'll get an alert. If y'know, you know.

tedsbikes
Posts: 92
Joined: Wed May 23, 2012 3:12 pm

Re: Technique Sports Superbike

Postby tedsbikes » Wed May 06, 2015 9:32 am

I bought one of these frames from a guy on the Gold Coast a few years ago. He had several of them and most had been well used.

After cleaning up the welds I had it powdercoated in charcoal grey. Built up with a carbon fork (Merida??) and 8 speed Chorus group.

I have some pix which I'll try to get up sometime (but I have other priorities - like health issues to deal with).

I also have some Superbike transfers. If you are interested please PM me.

Ted

User avatar
QuangVuong
Posts: 1794
Joined: Sun Feb 24, 2013 5:04 pm
Location: Villawood, Sydney

Re: Technique Sports Superbike

Postby QuangVuong » Sun May 17, 2015 9:47 pm

Earlier than expected, I managed to get the 6770 Di2 bits to finish off the 6700 group I had. Mixing old and new, with the 6400 pedals, CdA aero post, and a Rolls.
Image

Now, I'll get around to painting the frame. I'm thinking of just getting some spray putty over the current powder coat to flatten out the orange peel surface. Then get some bog to smooth out the HT welds, then go with a matte black finish. Plus the original decals from tedsbikes.

I'll also go with some integrated drops since I've only got the standard brake levers. Anyone have anything cheap around? A Cinelli Integralter would be nice, otherwise some unwanted Chinese carbon would do the job.
Last edited by QuangVuong on Sun May 17, 2015 10:00 pm, edited 1 time in total.
VillaVelo, by the Vuong brothers

Blog: https://villaveloframes.wordpress.com/
FB & IG: @villaveloframes

User avatar
HappyHumber
Posts: 5072
Joined: Wed Nov 14, 2007 11:48 pm
Location: Perth, (S.o.R.) W.A.

Re: Technique Sports Superbike

Postby HappyHumber » Sun May 17, 2015 9:59 pm

Cheezus Quang... You are def the 'new retro'... Kudos!
--
Hit me up via the BNA dm; I'll get an alert. If y'know, you know.

dayne
Posts: 651
Joined: Fri Dec 10, 2010 1:51 pm

Re: Technique Sports Superbike

Postby dayne » Sun May 24, 2015 11:19 am

These were a copy of the BT super bike and made by Bocar on the Gold Coast,
Bocar is a bullbar manufacturer.

User avatar
GaryF
Posts: 1201
Joined: Wed Dec 27, 2006 1:38 am
Location: Near Bundaberg, Queensland.

Re: Technique Sports Superbike

Postby GaryF » Sun May 24, 2015 12:44 pm

I just love your plans (concrete or not) for your superbike. It will be fantastic.

I remember seeing the Superbike frames for sale in Myer Melbourne and wanting one - which never happened unfortunately.

User avatar
HLC
Posts: 722
Joined: Sun Mar 04, 2012 11:23 pm
Location: Sydney.

Re: Technique Sports Superbike

Postby HLC » Sun May 24, 2015 7:07 pm

QuangVuong wrote:
Now, I'll get around to painting the frame. I'm thinking of just getting some spray putty over the current powder coat to flatten out the orange peel surface. Then get some bog to smooth out the HT welds, then go with a matte black finish. Plus the original decals from tedsbikes. .
That's a lot of work for something that's already satin/matte black. Your bike, but i would leave it. It is what it is and the visible welds make it unique!

User avatar
QuangVuong
Posts: 1794
Joined: Sun Feb 24, 2013 5:04 pm
Location: Villawood, Sydney

Technique Sports Superbike

Postby QuangVuong » Mon Jun 01, 2015 4:12 pm

Gary, do you remember which years these bikes were sold? And what parts were hanging off it, as well as the price?

Some decals arrived in the mail. Thanks to Tedsbikes, I believe these are original decals. I'll be sure to get them scanned and drawn up for the future.
Image

First bit if modification done. Drilled out the stop in the chain stay. This means if I want to go back to mechanical, then I would simply run housing all the way from the shifter to RD. I enlarged the FD cable hole to about 5.5mm so that I could get the cable plug through. The frame is about 2mm thick, but there's another chuck of aluminium(might just be the internal routing guide tube) behind which goes in for about 2cm. Same case here with regards to going back to mechanical. The housing would just exit the hole, and they'll be no issues.
Image

One more hole will be drilled in between the two FD tab screws. This hole will allow the wire from the battery(somewhere around the seatpost area) to exit the frame, and it'll be connected to the FD cable which will follow the internal routing guide up to the junction which I'll be running under the bars. Then I'll get the FD tab made up to allow clearance for that battery cable.
Image

Once the last hole is drilled, I'll get onto painting. Since the powdercoat is solid enough, I'll be roughing it up, and then filler priming to get a nice and smooth surface. Then onto the gloss black, decals, and finally a matte clear over the top.
VillaVelo, by the Vuong brothers

Blog: https://villaveloframes.wordpress.com/
FB & IG: @villaveloframes

User avatar
QuangVuong
Posts: 1794
Joined: Sun Feb 24, 2013 5:04 pm
Location: Villawood, Sydney

Technique Sports Superbike

Postby QuangVuong » Wed Jun 10, 2015 2:18 pm

Finished modifying the frame for Di2. Also modified a 6400 post for Di2 as well. Image

Paints I used. SCA filler primer, and Molotow Premium graffiti paint. My airbrush is in no way big enough to spray the frame efficiently, so I decided to go with spray cans. Someone suggested some graffiti specific cans, which sounded decent, but I do not like using them. Paint is very thick(high pigment), and so I wasn't used to using it. I got a decent job out of them, but I certainly won't be using them again.
Image

Here's the frame lightly sanded down with some 240 paper. I decided to paint over the powdercoat because it was still in good condition. Makes a good base coat.
Image

Primed and bogged up. I initially did use filler on the HT as well, but I didn't mix it well enough, and it remained tacky. So that took a bit of work getting it all off, and I ended up hitting the aluminium. So out comes the flap sanding bit and I ground down the HT welds.
Image

Ended up very nice and smooth. I did finish up hand sanding to control the finishing shape.
Image

Filler on the ST top.
Image

And some filler on the top and bottom side of the frame. Just to smooth everything out.
Image

Got some black paint on after etch priming the bare aluminium and filler primer over the top.
Image

And decals placed. Looks straight enough I think.
Image

And finally a 'matte' clearcoat over the top. I was hoping for a satin finish, but it ended up with something semi gloss. It's a bit more glossy than the forks and bars, but close enough.
Image

Here are some goodies I've got for it. Apparently a 3T Funda, and Enve integrated bars. I reckon the forks are replicas, and I know the Enve bars are copies of a Cinelli Ram. I've always wanted to get Chinese carbon(sole reason why I started collecting retro carbon), so I'll finally be able to have a go.
Image

Image

And some more carbon. Real FSA Neo Pro cranks. Also running some carbon wrapped brakes too.
Image

2 weeks, and if everything goes together without issues, the bike will be done.
VillaVelo, by the Vuong brothers

Blog: https://villaveloframes.wordpress.com/
FB & IG: @villaveloframes

bicyclepassion
Posts: 720
Joined: Mon Jan 11, 2010 1:38 pm

Re: Technique Sports Superbike

Postby bicyclepassion » Wed Jun 10, 2015 7:24 pm

"Gary, do you remember which years these bikes were sold? And what parts were hanging off it, as well as the price?"

I have one of the 'Myer' BT superbikes in my collection. This is a road version, and hung on the wall in the basement 'sports' department of Myer when they set up their bike dept. I believe it is a 1996 model.

It was originally equipped with Campagnolo Record, and Campag disc? and I believe the price tag was $12,000 in 1996. This was a heap of dough back then, still is I suppose.

I bought it a few years ago as a frame and fork, plus a spare pair of forks. The only remaining original parts left were the record front derailleur, and the record head fittings.

I have built it up and ridden it with correct year Shimano 600 8 speed. I tried to fit the 600 front derailleur, but because of the geometry, it would not fit in the cavity. So had to use the Campagnolo FD it came with, as it became obvious that this is what the cavity and cable routing were designed for.

It is original white with BT Superbike decals.

As a matter of interest, my apprentice and I spent an entire afternoon to set the internal cabling up. The gear cables go around a cotton reel type arrangement hidden inside the frame, which you get at by unscrewing and inspection port above the bottom bracket. Warren

User avatar
QuangVuong
Posts: 1794
Joined: Sun Feb 24, 2013 5:04 pm
Location: Villawood, Sydney

Re: Technique Sports Superbike

Postby QuangVuong » Sun Jul 05, 2015 3:11 pm

After another couple coats of a different brand satin, I've achieved a finish I'm happy with. However, I had many issues with differing paints and coats wrinkling up. At the end of it, it turned out good enough, but not the best.
Image

And getting it mostly together. Now I just need to sort out the custom Di2 wiring, and it'll be up and running.
Image
VillaVelo, by the Vuong brothers

Blog: https://villaveloframes.wordpress.com/
FB & IG: @villaveloframes

User avatar
jaseyjase
Posts: 2994
Joined: Tue Apr 21, 2009 2:00 pm
Location: Perth

Re: Technique Sports Superbike

Postby jaseyjase » Mon Aug 17, 2015 1:44 pm

QuangVuong wrote:And getting it mostly together. Now I just need to sort out the custom Di2 wiring, and it'll be up and running.
Image
looking incredible mate, kudos!

Lots of steel bikes
Posts: 852
Joined: Fri Dec 23, 2011 9:33 pm

Re: Technique Sports Superbike

Postby Lots of steel bikes » Mon Aug 17, 2015 5:54 pm

An early Superbike

Image

User avatar
ldrcycles
Posts: 9594
Joined: Thu Oct 28, 2010 3:19 pm
Location: Kin Kin, Queensland

Re: Technique Sports Superbike

Postby ldrcycles » Mon Aug 17, 2015 7:29 pm

I think this is one of your best restos yet, awesome result.
"I must be rather keen on cycling"- Sir Hubert Opperman.

Road Record Association of Australia

User avatar
GaryF
Posts: 1201
Joined: Wed Dec 27, 2006 1:38 am
Location: Near Bundaberg, Queensland.

Re: Technique Sports Superbike

Postby GaryF » Mon Aug 17, 2015 11:20 pm

bicyclepassion wrote:"Gary, do you remember which years these bikes were sold? And what parts were hanging off it, as well as the price?"

I have one of the 'Myer' BT superbikes in my collection. This is a road version, and hung on the wall in the basement 'sports' department of Myer when they set up their bike dept. I believe it is a 1996 model.

It was originally equipped with Campagnolo Record, and Campag disc? and I believe the price tag was $12,000 in 1996. This was a heap of dough back then, still is I suppose.

I bought it a few years ago as a frame and fork, plus a spare pair of forks. The only remaining original parts left were the record front derailleur, and the record head fittings.

I have built it up and ridden it with correct year Shimano 600 8 speed. I tried to fit the 600 front derailleur, but because of the geometry, it would not fit in the cavity. So had to use the Campagnolo FD it came with, as it became obvious that this is what the cavity and cable routing were designed for.

It is original white with BT Superbike decals.

As a matter of interest, my apprentice and I spent an entire afternoon to set the internal cabling up. The gear cables go around a cotton reel type arrangement hidden inside the frame, which you get at by unscrewing and inspection port above the bottom bracket. Warren
Sorry for my very late reply to your questions QV but I'm even more sorry that I have a very poor memory. I only remember drooling over the bare frames. Thank goodness Warren can fill in the details you ask about. As usual Warren's memory of everything bicycle is fantastic - and, wouldn't you know it, he has one.

P.S. It looks absolutely fantastic.

User avatar
QuangVuong
Posts: 1794
Joined: Sun Feb 24, 2013 5:04 pm
Location: Villawood, Sydney

Technique Sports Superbike

Postby QuangVuong » Sat Aug 22, 2015 8:58 pm

Warren's got one of the BT versions made from carbon. Mine is the poor man's version remadein aluminium about 10 years after.

It finally is up and running. Took about 4 months from when I got the frame til today when everything is together and working. Di2 is very new to me, and I reckon it took me more time to get it up and running compared to a cable pulled group. It wasnt a smooth process getting this old frame fitted up with the group. Due to the routing of the frame, the wiring had to run from one end to the other, so all the wiring popped out near the HT. I needed to somehow get the battery that is mounted under my saddle to connect to the junction under my stem and keep the wiring hidden.
Image

So first step was to drill a hole into the seatpost, which wasnt too bad. Then I had to find a way to get the cable to leave the frame and reach the HT. I decided that the best place to do so is to drill a hole behind where the FD tab is mounted, which means the cable exits the frame nice and clean. This was spliced with the FD cable, which was fed through the original guide to the junction. Upon test wiring, the system was not working. I couldnt figure out what the case was initially, but after a little bit, the battery got warm and I figured the wiring must be shorting the system. It is a simple modification, which I managed to stuff up. Strip the wires, and solder on the extension cable, then solder another plug to the extension.
Image

So that held me up for a while. Good thing a friend has a diagnostics box, and found that the battery mount was not working. Replacement one ordered, and wiring resoldered, and upon testing, the group works again. But, I ran into more issues. The wiring that I soldered up ended up being too short, so I ended up adding an extension to most of the cables.

The bare frame weighs in at ~2300g, and with the fake 3T Funda forks at 350g cut. All up, its way heavier than a decent steel frame. I ended up with a build that is 10.45kg, which isnt too bad.
Image

Image

Fake Enves, fake 3t forks, with Chinese carbon/aluminium wheels. Here's hoping they hold up.
Image

Image

FD tab crafted by Gefsco. The FD is sitting a bit tall, but i did design the FD mount for a 55t ring. I also dont like these cranks on this bike. Ill change them for some nice caron square taper cranks. Maybe Chorus or Record if I can find them for a nice price.
Image

Scratched RD. It actually was inside someone's wheel before. So I swapped out the cage from a 9s XTR RD, and sort of works. The top jockey wheel rubs the 28t cog when I in small ring.
Image

25c tyres are pretty tight in there.
Image

Some interesting info which I heard from Anatomic Bikes(Aussie company). Apparently they made the prototype aluminium Superbike for the company which was attached to Bocar. I assume that company would be would be Technique Sports. The two pressed halves were apparently seam welded by Mal McPherson, who did work under Anatomic Bikes. That was only the prototype. Production ones were made by Bocar.

This is only what I've heard, and am not sure how true it all is. If I could contact Mal, then I would be able to find out a bit more.

The serial number can be found on the top of the ST, -'d underside of the right side dropout. From the two known serial numbers, am led to believe that they go like this:
xx Bxxxxx

My serial is 58 B00381. The other serial is 56 B00111.

The first two digits in the serial is probably the frame size, in my case 58cm. I'm not sure where they measure a 58cm on my frame.

The letter, B in both serials I am not sure what it means. I was thinking it was the colour code. My frame was originally white, but the other frame was bare aluminium, so that letter could be something else. A few more numbers would be good.

The last five numbers is probably the frame number.
Last edited by QuangVuong on Sun Aug 06, 2017 1:50 pm, edited 1 time in total.
VillaVelo, by the Vuong brothers

Blog: https://villaveloframes.wordpress.com/
FB & IG: @villaveloframes

User avatar
rheicel
Posts: 2303
Joined: Sat Jul 14, 2012 5:01 pm
Location: Sydney
Contact:

Re: Technique Sports Superbike

Postby rheicel » Sun Aug 23, 2015 7:41 am

Wow QV, great job!
Image

User avatar
find_bruce
Moderator
Moderator
Posts: 10599
Joined: Mon May 09, 2011 8:42 pm
Location: Sydney

Re: Technique Sports Superbike

Postby find_bruce » Sun Aug 23, 2015 8:18 am

Fabulous work as always Quang. Slip a 10mm washer behind the derailleur & it will give you the clearance you need with the 28T - see velonews
Anything you can do, I can do slower

User avatar
ldrcycles
Posts: 9594
Joined: Thu Oct 28, 2010 3:19 pm
Location: Kin Kin, Queensland

Re: Technique Sports Superbike

Postby ldrcycles » Sun Aug 23, 2015 8:27 am

Unless it's just B for Bocar?
"I must be rather keen on cycling"- Sir Hubert Opperman.

Road Record Association of Australia

User avatar
find_bruce
Moderator
Moderator
Posts: 10599
Joined: Mon May 09, 2011 8:42 pm
Location: Sydney

Re: Technique Sports Superbike

Postby find_bruce » Sun Aug 23, 2015 8:58 am

ldrcycles wrote:Unless it's just B for Bocar?
Or B for Bike :wink:
Anything you can do, I can do slower

User avatar
QuangVuong
Posts: 1794
Joined: Sun Feb 24, 2013 5:04 pm
Location: Villawood, Sydney

Technique Sports Superbike

Postby QuangVuong » Sun Sep 27, 2015 7:49 am

So, on the first ride, my left crank fell off.
Image

Reason being that I spaced the right BB cup out about 2mm, thinking that would essentially make it like a 70mm Italian BB width. This would also provide clearance for my FD. But, for some reason there wasn't enough axle sticking out, so only one of. The pinch bolts were actually doing something. About 2km from home, 60km into the ride, the crank fell off. Splines are only very slightly damaged, but good enough to use otherwise.
Image

So, back to square taper. I can space these cranks out or in as much as I would like from just the axle length. The cranks will always sit on the square tapers as they should. Carbon Record was what I chose. Not too many other 10s square tapers that are nice enough to choose from.
Image

So the final build ended up at 10.4kg with the new cranks and BB. The FD mount has been modified and dropped a bit so that the FD actually sits in the correct position. Also running some carbon wrapped brakes for looks.
Image
Last edited by QuangVuong on Sun Aug 06, 2017 1:52 pm, edited 1 time in total.
VillaVelo, by the Vuong brothers

Blog: https://villaveloframes.wordpress.com/
FB & IG: @villaveloframes

Who is online

Users browsing this forum: No registered users